A Scraphappy Southernbelle

Monday, June 27, 2011

Let Freedom Ring with a 4th of July Gift

Hey guys! Happy Monday! I've got a new post going up on the "She's A Sassylady" blog and wanted to share what I have created. I created this card and cupcake wrapper using my Cricut Expression, Sure Cuts A Lot Software, and SVG files from SVGCuts.com. I thought it would be a nice gesture to make cards and send a cupcake along with it to my friends for the upcoming 4th of July holiday.
 "Happy 4th" Card

Supplies Used
Cardstock: The Paper Studio, Bazzill Basics Paper
Patterned Paper: BasicGrey
Glitter Glue: Stickles (Ranger Industries)
Adhesive: Helmar
Electronic Cutter: Cricut (Provo Craft)
Electronic Cutting Software: Sure Cuts A Lot 2 (Craft Edge)
SVG's: SVG Cuts (Made In The USA)

If you are interested in this set of files, go HERE.
 I have 2 layers of dimension on this card. I popped up the scalloped star and then popped up the silhouettes on top of that.
 "Happy 4th" Cupcake Wrapper

Supplies Used
Cardstock: The Paper Studio
Pearls: Queen & Co.
Electronic Cutter: Cricut (Provo Craft)
Electronic Cutting Software: Sure Cuts A Lot (Craft Edge)
SVG: SVG Cuts (Made In The USA)
Tasty Cupcake: Shur-Fine :)
 Don't these look yummy?! I have to confess...I've already ate 2! But no more...
Thanks for stopping by my blog today! I hope you have enjoyed this project!

Also, I hope that you have a wonderful, safe 4th of July holiday! God Bless!
And Happy Scrappin'!!!
Pin It!

Sunday, June 26, 2011

Too Cute To Spook

Hey y'all! Happy Sunday to you! I hope you are having a wonderful weekend! I wanted to hop online right quick and do a blog post. I finished this page a few days ago. This is another page to go in the Kiel album. This page focuses on little Audrey's first Halloween. This page is very bold with all the bright Halloween colors I found in my scrappy stash.

"Too Cute To Spook"

Supplies Used
Cardstock: The Paper Studio
Patterned Paper: The Paper Studio, Die Cuts With A View, My Mind's Eye
Alphabet Stickers: Momenta, Jillibean Soup, American Crafts, Jenni Bowlin Studio
Chipboard Stickers: American Crafts
Ribbon: Decorative Trim (Hobby Lobby)
Twine: Divine Twine
Electronic Cutter, Cartridge: Cricut (Provo Craft), Plantin' Schoolbook
Software: Sure Cuts A Lot (Craft Edge)

I noticed after I took this photo that I may need to move the words 'too cute' up just a tad. I thought the black trim was more sheer than what is coming through in the photo. So I think I'll go back and move them up a tad. So visualize the words 'too cute' moved up. LOL! Excuse my boo boo!
 I cut these banner pieces using my Cricut and SCAL software. And I simply adore these puffy alpha's from Momenta! I'm definitely going to have to order another set or two. I adhered my twine with Liquid Scrap Dots.
 I used a mixture of alpha's on this page. And check out the ribbon trim I found at Hobby Lobby! Isn't it the cutest trim?!! And it was half off on sale!!
 I pulled this chipboard from my sticker bin. I got it last year on clearance at Big Lots.
Ok, back to the scrappy desk for me. I have work due and need to get busy busy!!! See you tomorrow with some new scrappyness! Enjoy your day!!!

Happy Scrappin'!
Pin It!

Friday, June 24, 2011

Operation Write Home Challenge: Day 6 & 7

Hey y'all! Happy Friday! I hope you are enjoying a wonderful weekend so far! I've been at my scrappy desk today. I managed to finish 2 more cards for the 'Operation Write Home' Challenge and a layout. I'll take pix of the layout tomorrow and post it. But today, I thought I'd hop online and do a blog post with the 2 cards I finished. First up...

"I'm Wild About You"

Supplies Used
Card Base: The Paper Studio
Cardstock: Bazzill Basics Paper, The Paper Studio
Patterned Paper: Jillibean Soup
Die Cut: K & Company
Rhinestones: Studio 18
Trim: Ribbon FX (Hobby Lobby)
Twine: Divine Twine
Corner Punch: EK Success
Border Punch: Martha Stewart Crafts
Adhesive: Helmar Quick Fix Adhesive Runner, Helmar 450 Quick Dry Adhesive, Helmar Liquid Scrap Dots

This card is for Day 6 of the Operation Write Home Challenge. The specs of the challenge are to create a masculine card and to use twine. Well, I don't know how masculine you would call this card. Masculine projects are not my forte'. LOL. But the little monkey on this die cut looked like a boy to me and was the inspiration behind my patterned papers and embellishments. The colors red and brown together also look masculine to me. So although this card may be a tad cutesy, I did my best and am happy with it.
 
"In Sympathy"

Supplies Used
Card Base: The Paper Studio
Cardstock: The Paper Studio
Patterned Paper: Crate Paper
Rub On: Kaisercraft
Ribbon: Ribbon FX (Hobby Lobby)
Thread: Coats & Clark
Border/Edge Punch Combo: Martha Stewart Crafts
Electronic Cutter, Cartridge: Cricut (Provo Craft), Home Decor'
Embossing Machine, Embossing Folder: Cuttlebug (Provo Craft), Swiss Dots
Adhesive: Helmar Quick Fix Adhesive Runner, Helmar 450 Quick Dry, Helmar Zap Dots
Other: sewing machine

This card is for day 7 of the challenge. The specs of the challenge are to create a sympathy card. I used a palette of blues, creams, and blacks. I tried to keep this card formal looking.

See you tomorrow! Have a great evening!

Happy Scrappin' to ya!
Pin It!

Wednesday, June 22, 2011

Operation Write Home Challenge: Day 4 & 5

Happy Wednesday everyone! I hope you are having a wonderful day! I have been working at my scrappy desk today having a grand old time! I was able to finish 1 layout and 2 cards. I will have to share the layout at a later date as it is for Momenta...my very first Momenta project actually. I am so excited about it! Those Momenta products are just beyond adorable and so fun to work with!!!

Anyways, I created my cards for day 4 & 5 of the 'Operation Write Home' challenge that I am participating in. As you may already know, these cards will be sent overseas to our soldiers so that they may write to their loved ones. I am keeping all of these cards fairly simple and not dimensional. I wanted them to fit into the envelopes and be easy to mail. So here we go with the next two...

"Hello"
Supplies Used
Cardstock: Bazzill Basics Paper, The Paper Studio
Patterned Paper: K & Company
Chipboard Alphabet Stickers: BasicGrey
Rhinestones: Queen & Co
Trims: source unknown (purchased at a local discount store)
Electronic Cutter, Cartridge: Cricut (Provo Craft), Home Decor'

This card is for day 5 of the challenge. The challenge was to use purple flowers on a card. I have purple flowers in my patterned paper.
 Love these trims. I got them each 99 cents a yard at a local discount store we have in our town called 'Surplus City.' I love that place! There is an aisle full of trims, ribbons, lace, etc. Love it!!! And it's so affordable!
 "Hi"
Supplies Used
Pre-Printed Card Base: The Paper Studio
Cardstock: The Paper Studio
Patterned Paper: Cosmo Cricket
Alphabet Stickers: Cloud 9 Design
Corner Sticker: Daisy D's
Flowers: Prima Marketing
Button: Jenni Bowlin Studio

This one is for day 4 of the challenge which required you to use red buttons on a card. I only had 1 red button in my scrappy stash, so I used it.
 Popped my flowers up just a tad with Liquid Scrap Dots.
That's all for today. Brandon and I are off to Hobby Lobby tomorrow, so I don't know if I'll get to scrap or not. But I will for sure on Friday. See you later!

Thanks for visiting my blog! Happy Scrappin'!!!
Pin It!

Tuesday, June 21, 2011

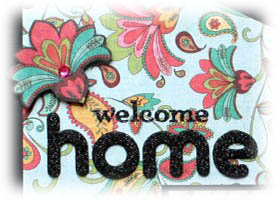
Welcome Home

Hey y'all! I hope you are having a fabulous day! I wanted to hop online right quick and blog. I created this layout yesterday afternoon. This page is the next in the album I'm working on for Mrs. Kiel and her baby girl, Audrey. This page focuses on Audrey's first week at home. This is the first layout in a really long time that I did on a black cardstock background. But I loved the way the bold black popped with this patterned paper I purchased at Hobby Lobby.

"Welcome Home"
Supplies Used
Cardstock: The Paper Studio
Patterned Paper: My Mind's Eye, The Paper Studio
Alphabet Stickers: American Crafts, Making Memories
Journaling Die Cut: Elle's Studio
Rhinestones: Queen & Co
Border Punch: EK Success
Cutting Tool: Purple Cows Freestyle Mouse
Adhesive: Helmar Quick Fix Adhesive Runner, Helmar Zap Dots
I cut this flower out of some coordinating patterned paper. I popped it up with Zap Dots and added a rhinestone to the flower.
This die cut, from Elle's Studio, is a place where the new Mom may journal her thoughts.
I cut the flower above the title out of the same coordinating paper as the one above. The alpha's are a mixture of Making Memories and American Crafts. 
 To show a bit of the dimension.
That's all for me today. Thanks so much for stopping by! I hope you all have a wonderful evening!
Happy Scrappin'!!!
Pin It!

Monday, June 20, 2011

'Operation Write Home' Challenge: Day 2 & Day 3 Cards

Hey y'all! Happy Monday! I sat down at my scrappy desk this morning while the hubby was still asleep and started working. I created 2 cards for the Operation Write Home challenge. This is a challenge on the DIY message board. We are creating these cards to send to the soldiers overseas so they can write to their loved ones. Each day we have a challenge to create a card by. So here are my cards for yesterday and today...

"Hey There Sweetpea"
Supplies Used
Pre-Printed Card Base: The Paper Studio
Cardstock: The Paper Studio, Core'dinations
Patterned Paper: Cosmo Cricket
Alphabet Stickers: BasicGrey, Jenni Bowlin Studio
Twine: Divine Twine
Other: sanding block

For this card, I created a banner out of little pea pods. I cut the pea pods out of some patterned paper from Cosmo Cricket. The red cardstock in the background is some embossed cardstock from Core'dinations. I sanded it a tad. This card is for Day 2 (yesterday) of the Operation Write Home Challenge. The challenge requires you to use striped patterned paper. I have striped pattern paper in the background and my cardstock is also striped.
 I popped up the pea pods with some Zap Dots. I adhered my twine bows with Liquid Scrap Dots.
"Hello"
Supplies Used
Pre-Printed Card Base: The Paper Studio
Cardstock: The Paper Studio, Bazzill Basics Paper
Patterned Paper: The Paper Studio
Pearls: Queen & Co
Lace: Joann
Border Punch: Martha Stewart Crafts
Electronic Cutter, Cartridge: Cricut (Provo Craft), Home Decor'
Software: Cricut Gypsy (Provo Craft)
Adhesive: Helmar Quick Fix Adhesive Runner, Helmar Fray Stoppa

For today's challenge, we were asked to create a card using floral patterned paper. I chose some floral patterned paper for the background. This card is very simple and came together fairly quickly.
 I raised up the edges of my border punched papers for some dimension.
I also had time to create a layout while I was at my scrappy desk. However, it is raining here today and I cannot get a good picture. So hopefully I can snap a pic tomorrow and share with you. So I'd love for you to stop by tomorrow to see that. It is a layout for Mrs. Kiel's album.

Thanks for visiting my blog! I hope you all have a wonderful day!
Happy Scrappin' to ya!!!
Pin It!

Saturday, June 18, 2011

In The Mood For Cards!!!

Hey y'all! Hello again! Two blog posts in one day...I'm on a roll! I sat down at my desk tonight and created a few simple, clean line cards. While scrappin', I listened to/watched that Disney movie 'Pocohontas.' So I was able to finish all of these during the movie. So 3 cards in a little over an hour is not too bad.

First up, I wanted to play along with this weeks challenge at "She's A Sassylady." This weeks challenge is to make a card, any card, AND double it. This way we can use up those scraps and have double the cards in our card stash! What a great idea! If you'd like to play along in the challenge too, go HERE.

Now, I saw a card a few weeks ago in a magazine that had the cutest little TV stamp and the words 'you turn me on' stamped on there. Well I just had to re-create this card. It really made me giggle! So I figure I'll keep one of these cards and put it out for my hubby one day for no reason. Then I thought I'd send the other one to my Mom so she can give it to my Daddy (from her of course) for a chuckle. Here is my take on it...

"You Turn Me On"
Supplies
Pre-Printed Card Base: The Paper Studio
Cardstock: The Paper Studio
Patterned Paper: Die Cuts With A View
Pearls: Queen & Co
Corner Punch: EK Success
Electronic Cutter, Cartridge: Cricut (Provo Craft), Mickey & Friends
Software: Cricut Gypsy (Provo Craft)
Font: Bradley Hand
Other: craft wire

I cut the little retro looking TV out using my Cricut and the 'Mickey & Friends' cartridge. I created the antenna using some craft wire and adhered it to the back using my Liquid Scrap Dots. I popped it up using Zap Dots. I printed my phrase onto some cardstock using my computer. And of course since the challenge required you to make double, I made 2.
 Here's a closer view of my card. I am really loving this patterned paper from DCWV. It's so pretty!
 A bit of dimension...
 Next up, I am participating in a little project on the DIY Scrappy Message Board. We are all getting together and creating cards for 'Operation Write Home.' This is a program where crafters make cards and they send them over to our troops so they can write back home to their loved ones. I have always wanted to participate in something like this, so I am so happy Vicky got this started over on DIY. We are doing a 30 day challenge. You make a card a day for 30 days and all of those will go to the troops. The cards need to be A2 sized and CANNOT contain glitter.  If you are interested in playing along, go HERE for all the details.

Now, each day we are given instructions for our card. Today's challenge was to create a card with a pinwheel on it. Here is what I came up with. I kept it very simple and did not add much dimension at all. This way it fits into the envelope nicely.

"With Love"
Supplies
Pre Printed Card Base: The Paper Studio
Patterned Paper: Die Cuts With A View
Rhinestones: Queen & Co
Button: The Paper Studio
Rub On: Kaisercraft
Corner Punch: EK Success
Electronic Cutter, Cartridge: Cricut (Provo Craft), Home Decor'.

To create the pinwheel, I cut out 4-1 inch circles using my Cricut. I cut 2 in a bold pattern and 2 in a neutral pattern. I then cut each circle in half and alternated them to create the pinwheel.
 I lifted up the edges of the pinwheel a bit.
Thanks for stoppin' by! Have a great weekend!
Happy Scrappin'!!!
Pin It!

Ticket To Ride

Happy Saturday Everyone! I hope you are having a grand weekend so far! I have a new project to share with you today. I have been working on this project all week long! I don't think I have ever worked on a project as long as I worked on this one. I wanted to add a lot of fun details and it took me a bit of time. But, it was all well worth it because I am so happy with this project! I just love anything that is carnival/county fair themed. So I have created a 'Carnival Funhouse' Gift Box that is filled with 10 cards. Here is my finished project:

"Carnival Funhouse" Gift Box
Supplies
Cardstock: The Paper Studio, Core'dinations, Bazzill Basics Paper, The Paper Company
Patterned Paper: Sassafras
Rhinestones, Pearls: Queen & Co
Ribbon: Offray
Lace: Fancy Pants Designs
Glitter Glue: Stickles (Ranger Industries)
Ink: Colorbox (Clearsnap)
Pen: Stampin' Up!
Electronic Cutter: Cricut Expression (Provo Craft)
Electronic Cutter Software: Sure Cuts A Lot (Craft Edge)
SVG's: SVG Cuts (and I handmade a few myself)

My gift box was created by using the 'Peony Cottage' gift box file found HERE at SVGCuts.com. If you have SCAL, I highly recommend this set of files! This Peony Cottage is so versatile! It can be turned into anything from a cute little house, to a haunted house, to a gingerbread house, to a carnival funhouse! LOL. AND they are having a sale right now! So scoop it up while you can! Also, I used a set of files called 'A Day At The Carnival', also from SVGCuts.com. Those can be found HERE. I created the 'coaster tracks' and 'half circle scalloped banner' myself using Inkscape. If you would like either the coaster tracks or the banner svg's, shoot me an email at aymee810@yahoo.com and I'll be glad to share with ya!

I wanted my funhouse to have a roller coaster ride going around the outside and 'into the funhouse.' As you can see, the riders of the coaster go around the box and then 'inside the mouth' of the clown to ride on the inside in the dark. I adhered my coaster tracks so that they are going up and down. This also gave my gift box a lot of dimension.

(Note: You can click on any of these pictures to make them bigger and then just hit the back button to return to this post.)
I wanted the rooftop of my house to resemble the red/white striped tents you see at the carnival. To achieve this look, I first cut out my rooftop in red and put it together as per the instructions. I then cut out the roof again in white and used my scissors to hand cut the stripes at an angle. The lines aren't perfectly spaced, but I was pleased with how they came out. Also, around the roof, I placed miscellaneous candies and treats like you see painted on the buildings at the fair. I added the half circle banner to also provide some fair looking fun.
 Here is a view of the right hand side of my box. The 3-D windows near the bottom also came with the 'Peony Cottage' set of files from SVG Cuts. I added some cotton candy to the front of my window. And as you can see, the coaster track goes around the window. At the top, I have 2 corn dogs criss crossed. I added a bit of ink to the top portion of the corn dogs to make them more realistic. I also have a little man walking on stilts on the front of my funhouse.
 Here is a view of the left hand side of the funhouse. It pretty much mirrors the right hand side. Also, you can see a car of riders on the coaster tracks going by. I just loved this svg in the set. It's so cute!
 Up close to show the dimension of the window and coaster tracks...
 Here is the back of my funhouse. Again, you see the coaster tracks going around. I added another clown that would thrill the riders as they go by! LOL. For the roof, I added a lighted sign, a few treats, and the word 'funhouse'...all from the 'A Day At The Carnival' SVG set.
 Up close of the car and riders inside...didn't I tell you it was cute?! I love SVG Cuts.com!!!!
 I adhered this car at an angle using my Liquid Scrap Dots.
 Now, here is a view of the roof being taken off to show the gift box inside...
 I have 10 A2 sized note cards and envelopes tucked inside.
Now, since my funhouse was so ornate, I decided to go more simple with the note cards that were tucked inside.

"Funhouse" Note Cards
Supplies
Cardstock: The Paper Studio, Core'dinations, Bazzill Basics Paper
Patterned Paper: Sassafras
Rhinestones: Queen & Co, The Paper Studio
Glitter Glue: Stickles (Ranger Industries)
Star Punch: Creative Memories
Embossing Machine: Cuttlebug (Provo Craft)
Embossing Folder: Cuttlebug (Provo Craft), Swiss Dots
Electronic Cutter: Cricut Expression (Provo Craft)
Electronic Software: Sure Cuts A Lot (Craft Edge)
SVG's: SVGCuts.com

I left each of these cards blank on the inside.

"Hot Air Balloon" Card
"Caramel Apple" Card
 "Lemonade" Card
 "Cotton Candy" Card
 "Carousel Horse" Card
 "Popcorn" Card
Whoo! Ok, is that not the longest post ever?! LOL! But, I wanted to share with you what I had accomplished this week! I hope you have enjoyed this post!

If you would like to see more takes on the 'Peony Cottage' set of files, head on over to the SVG Cuts Facebook page! Man on man, there are some cute ideas over there! I am always amazed!

Thanks for visiting my blog! I hope you have a wonderful weekend!
Happy Scrappin'!!!
Pin It!

Wednesday, June 15, 2011

It's A Card Making Kind Of Day

Hey Everyone! Happy Wednesday! I hope you are having a wonderful day! I have 2 new cards to share with you today. This first card was inspired by all of the beautiful twine projects I've been spotting online and in magazines. I am always amazed at what fellow crafters can do with this adorable crafty medium! So I wanted to give some twine a try. For this card, I created a ribbon spool SVG. I cut the spools out of some brown patterned paper that I found in my scraps bin. I then put some adhesive on the back and wrapped the twine around each spool. I used some pop dots to pop these spools up on my card. I also added a couple of pins to 2 of the spools. The twine and pins on this card could easily be removed and reused by the recipient of this card. 

Also, if you would like this ribbon spool SVG, shoot me an email at aymee810@yahoo.com and I'll be glad to share. I created it this morning especially for this project.

"Hi" Card
Supplies Used
Cardstock: The Paper Studio, Bazzill Basics Paper
Patterned Paper: Fancy Pants Designs
Rhinestones: Glitz Design
Alphabet Stickers: Fancy Pants Designs
Twine: Divine Twine
Pins: Making Memories
Corner Punch: EK Success
Electronic Cutter: Cricut Expression (Provo Craft)
Software: Sure Cuts A Lot
Embossing Machine: Cuttlebug (Provo Craft)
Embossing Plate: Sizzix (Ellison)
Adhesive: Helmar Quick Fix Adhesive Runner, Helmar Zap Dots, Helmar 450 Quick Dry Adhesive
Here is my card...
 To show a bit of dimension on the card...
 I added a couple of smaller spools of twine to the inside of the card.
Now on to the next card. This morning I was blog hopping and visited the fabulous Momenta Blog! I am so glad I did because I saw a card by Christine Meyer that was just the cutest! Christine showed how to use your border punch and paper scraps to create a unique look. Check out her project HERE. Isn't that the cutest?!!! I hope Christine won't mind me lifting her idea. I had purchased the punch she used a few weeks ago and haven't used it too much. So I just had to give this a go and I'm so glad I did! It's a great way to use up scraps and to add a pop of color! Thank you Christine for the wonderful inspiration!!

"Thanks" Card
Supplies Used
Cardstock: Core'dinations, The Paper Studio
Patterned Paper: Die Cuts With A View
Alphabet Stickers: American Crafts
Rub On: Kaisercraft
Rhinestones: Queen & Co
Lace: JoAnn
Border Punch: EK Success
Adhesive: Helmar Quick Fix Adhesive Runner, Helmar 450 Quick Dry Adhesive
I lifted up the border punched edge a bit for added dimension on the card.
 I added another strip to the inside and a rub on.
I'm back to my crafty desk to work on another project...a carnival themed one. If I finish it today, I'll be sure to share. Thanks for visiting my blog! And enjoy your evening!
Happy Scrappin'!!!
Pin It!