Hey yall! Just a heads up...if you are visiting and thinks look kinda wonky, please excuse for a bit. I am reworking my blog! Thanks! Happy Halloween!
Sunday, October 31, 2010
Tuesday, October 26, 2010
Helmar Blog Post & A 'Sassy' Challenge
Hey guys! Happy Tuesday! I hope you all are having a fabulous day! I have a new project going up on the Helmar blog today and wanted to share it with you here too! If you would like to check out the project (more pix and project info on there), go HERE. For this post, I created a special project for my Mom. It is a gift set consisting of a Christmas themed kitchen door hanger and refrigerator magnet. I used the following Helmar Adhesives on my project:

Here is my project...
I used my Cricut Expression, Cricut Gypsy, and the 'From My Kitchen' Cricut cartridge for this project.This patterned paper is from My Mind's Eye. I hope my Mom will like these in her Christmas kitchen, which is decorated in a gingerbread theme. I think she will! :)

This is the larger apron. It is about 10 inches tall. It is made to either hang on a door knob or could be hung on the wall.

I added lots of dimension with the use of Helmar Zap Dots, ribbon, lace, and Dew Drops.

These Dew Drops are from 'The Robins Nest' and were adhered with Helmar Gemstone Glue.

This is the smaller apron, which is the refrigerator magnet. It is about 5 inches tall.

Added more dimension and bling to this one as well...

Now, while I was getting my scrap on yesterday completing these project, I decided to play along with this weeks challenge at 'She's A Sassy Lady.' Every Saturday, Sheila shares a new tutorial on using your Cricut Gypsy. As I've mentioned before, these are SOOOO helpful! They really getting you to using your Gypsy and learning all you can about it. This week's tutorial focuses on creating 'partial shaped cards.' If you would like to check out this tutorial, go HERE. I love anything shaped, so I knew I had to give this a try. I used the Seasonal Thanksgiving Cricut cartridge for creating my shaped card. I'm addicted to this cartridge right now. Here is what I came up with:

Supplies used on this card:
1. Patterned Paper: Pink Paislee
2. Cardstock: The Paper Studio
3. Punch: EK Success
4. Lace: Jo Ann
5. Adhesive: Helmar Premium Craft Glue, Helmar 450 Quick Dry

This pilgrim lady flourish cut is just my fave! The sentiment on the card is also from the Seasonal Thanksgiving cartridge.

So if you own a Gyspy, hop on over to Sheila's blog and check out this tutorial! I think this is a great new take on cards and it is so easy to do!!! I can't wait to make another partial shaped card!
As always, thank you so much for stopping by my blog! I hope I have inspired you in some way today! Have a fabulous day and Happy Scrappin'!

Monday, October 25, 2010
'Squeezing' In Some Scrappin'
Good Morning! Happy Monday! How are you doing today? Good, I hope! I am hoping that this week will bring some long awaited news for us. But we will see. I just hate when you have to wait on something. I am so impatient!!! LOL. Anyways, today I have a new post going up over at She's A Sassy Lady for some DT work and I thought I would share my project with you guys as well.
As you may know from yesterdays post, I spent the whole weekend with the hubby, which is so rare. He works all the time and we rarely get to see each other, so I had to make the most of the time we were given. But I knew I had some work due so I sat down and 'squeezed' some scrappy time in and created a simple little project that I've been wanting to do....some Thanksgiving silhouette decorative frames to put in my home for the Thanksgiving season. These were super easy, super quick, and so affordable!!! I started with my girl Esmerelda (my Cricut Gypsy) and the Seasonal Thanskgiving Cricut Cartridge. I selected the Pilgrim Woman and Pilgrim Man silhouettes. But when I went to size them, I knew I was going to have to tinker with them to get them to fit into these small frames that I purchased for $1 each at our local Dollar Deals store. So I unchecked the 'keep proportion' box on my Gypsy and 'squeezed' these shapes in a tad. So now they are a bit skinnier, but fit perfectly into my frame. I used cardstock from The Paper Studio and patterned paper from K & Company. I adhered everything down with the Helmar Quick Fix Adhesive Runner. Here is the Pilgrim Woman frame:

Can't beat these frames for a $1 at the store too!!! I plan on putting these 2 frames next to each (facing one another) other on a end table in our living room.

Pilgrim Man Silhouette Frame

While I was making these, I went ahead and made another set to send to my Mom. We are both big decorators. We love to change up the decor' in our homes during holidays. So I hope she will enjoy hers. I added some lace trim to outer edge of her frames to jazz them up a bit more.

So next time you are at your local dollar store, check out the frames section! I was very surprised at the selection offered by mine. These are real wood frames and do not look cheap at all. Or at least I thought so. These could also be hung on the wall by adding some ribbon. And don't tell the hubby, but I bought 4 more frames too to jazz up for Christmas! LOL. I am on a altered frame kick I believe. You have to give this a try! These are so easy to do and would make great gifts!!!
As always, thanks for stopping by my blog! I hope you have a wonderful day and have enjoyed this simple project! Happy Scrappin'!
Sunday, October 24, 2010
Lemon Dill Tilapia
Hey yall! Happy Sunday! I hope you have enjoyed a relaxing weekend! The hubby and I stayed busy busy busy. He had 3 whole days off, so I did not get to do much scrappin'. I did complete one small project, but it's for some DT work. I will share that with yall tomorrow. In the meantime, yall know I love to cook, right? I made a new dish today that I thought I would share with you. This one is a definite keeper! It was absolutely delectable! AND low fat! It was so fresh tasting and I enjoyed every bite. I served this along side a baked potato and some garlic cheddar biscuits. I was jokin' with Brandon that Red Lobster ain't got nothing on me! ROFL!
Here it is....Lemon Dill Tilapia

I love the fresh dill in this dish! So refreshing!

Lemon Dill Tilapia
Ingredients:
2 Tablespoons olive oil
2 garlic cloves, minced
1/4 teaspoon salt (I am watching my salt intake, so I reduced this to 1/8 t. in my dish and it was fine)
1 pinch freshly ground black pepper
1 lemon, zested and sliced
A few pats of butter
4 Tilapia filet's (about 1 lb.)
2 Tablespoons lemon juice
1 teaspoon Dijon mustard
1/4 teaspoon dill weed (I used fresh, but the recipe says dried. I just prefer fresh herbs if possible.)
Directions:
1. In a small bowl, whisk together olive oil, garlic, lemon zest, salt, and pepper.
2. Spoon mixture over the fish filet's.
3. Add a few pats of butter to the top of the filet's and then lay lemon slices decoratively over the top. (Note: I added in a little extra step that was not included in the recipe here...I added just a little fresh dill for extra taste. We love dill in this house! LOL.)
4. Bake in a greased baking sheet on 350 degrees for 20-25 minutes or until fish flakes easily when tested with a fork.
5. While fish is baking, whisk together the lemon juice (I used fresh, but you can use bottled), mustard, and dill weed.
6. Drizzle mixture over the top of the fish before serving.
7. Enjoy!!!
I hope yall will give this a try! I loved it! It was so refreshing and I love the flavor of the tilapia...very mild. Now the baked potato I served along side this was not too bad. We used low fat sour cream, but I did add just a teeny bit of butter and shredded cheese. But the garlic cheddar biscuits...that's one I'll have to work off! LOL.
Have a fabulous evening! I'll see ya tomorrow with a new scrappy project!
Happy Scrappin'!
Thursday, October 21, 2010
A 'Scrap-Lift-Lift'
Hello everyone! Happy Thursday! I hope you all are having a wonderful day so far! Today, I have a fun little project and tutorial to share with you. But first, have you ever received a gift in the mail from one of your fellow scrappy gal pals and just fell in love?!!! You love it so much, you must figure out how to create one for yourself! For me, I received this little notecard set from my friend Sheila for my birthday. Isn't it adorable?! She even put the initial for my last name on it!
Check out Sheila's project:

So, of course, I emailed Sheila to ask her permission to scraplift her idea. It turns out, she scraplifted the idea from her friend Kristy. So in a manner of speaking, this project is a 'scrap-lift-lift.' LOL. I wanted to give credit where credit is due and link up each of their blogs for you to check out. Both of them are amazing artists!
So, let's start with the tutorial. Now, this is the way I created the project. I may of done a few things different from the original, but I tried to stay as true to it as I could since I loved it so much. I first picked out one sheet of patterned paper from Jenni Bowlin and one sheet of matching cardstock. I knew I wanted my notecard set to be a gift for my Mom for the month of November. Of course, our favorite holiday, Thanksgiving, falls in November, so that is the theme I went with for my project. But you could do this for any holiday or occasion. It really is the perfect little gift for your loved ones.
1. Begin with a piece of 8 1/2" x 11" piece of cardstock. Score as shown below at the 5 1/2" and 2 1/2" marks. If you have a 'Scor Pal,' now would be the perfect time to use it. But if you are like me and do not own one of these nifty gadgets, I find a bone folder and the groove in my Fiskars paper trimmer to do just the trick.

2. Fold the bottom up like this, smoothing out the crease with your bone folder:

3. Then fold the side over, like you are closing a book, and smooth with bone folder.

4. When you open it up, it should look like this:

5. Now, for me, I chose to decorate the outside of my notecard set first. For this, I used:
Cardstock: Core'dinations, The Paper Studio, Die Cuts With a View
Patterned Paper: Jenni Bowlin
Ribbon: Jillibean Soup, Ribbon FX
Glitter Glue: Ranger Industries
Punch: Martha Stewart Crafts
Electronic Cutter, Cartridges: Cricut (Provo Craft)
Electronic Software: Cricut Gypsy (Provo Craft)
I just love the 'Thanksgiving' cartridge from Cricut! I used it for the cornucopia flourish accent on the front. The sentiment and initial of 'F' (for my Mom's last name) were cut from the Gypsy Font and Gypsy Wanderings cartridges.

6. Now, we can focus our attention to the inside of the notecard set. First, while the 'book' is closed, you will want to punch a hole for the ribbon to feed through. I chose to use my Crop-A-Dile for this. Once the hole is punched, feed your ribbon through as shown below. Now, you will want to add a dab of adhesive to the center of the 'book' to hold your ribbon in place. For me, I turned to my favorite adhesive, Helmar 450 Quick Dry.

7. Now, we can work on our little notecards to go inside the 'book.' To allow them to fit into a basic notecard sized envelope, they will need to be 4 1/4" x 5 1/2". Also, your leftover patterned paper scraps can be used to embellish the cards....this way they will match. I chose to put the initial on a scalloped circle that I punched using a Fiskars punch. I popped this scalloped circle up using a Helmar Zap Dot. You know me, have to add that dimension! LOL. Also, I chose to add another initial to the flap of the envelope for another personalized touch. My Mom loves personalized stuff and I know she will love all the initials. Once you have finished your notecards and envelopes, simply slide them down into the pockets we created inside the 'book.' Then tie it up and send it out to your friends/family.

Just to show you the dimension from popping up the scalloped circle....

Up close of my cornucopia...

I used Helmar Zap Dots to pop up the cornucopia as well. I used the Helmar Quick Fix Adhesive Runner for the gluing down of the papers. For the ribbon, I used Hemar 450 Quick Dry Adhesive.

Now, how easy was that?! I am just so grateful that Sheila and Kristy inspired me to do one of these. I had so much fun and I know I'll be doing more for my friends and family very soon!
Thanks for stopping by my blog! I hope you have a fabulous day! Happy Scrappin'!
Wednesday, October 20, 2010
Gypsy Challenge & A New Recipe
Hey yall! Happy Hump Day! I can't believe Wednesday is already here! I was thinking this was going to be a long week, but it looks like it is moving by pretty quickly...thank goodness! LOL. The hubby actually will be off all weekend! This is a RARE thing! So I am looking forward to spending some quality time together...something we rarely get to do. I'm so excited! Whoo hoo!
I wanted to hop online today and share a new project I have created with you. I created this project for the current Gypsy Challenge on the 'Gypsy Chat' section of the Cricut Message Board. As you already know, I just love playing in these challenges! It really gives Esmerelda a workout! I also learned about using templates this week with this project. I have been wanting to alter a basic 8x10 frame for some time and I thought this challenge would be a perfect opportunity to do so. I picked up this frame at our local 'Dollar Tree' store, so very inexpensive. I did go browsing around our local thrift shops too though, but did not come up with anything on the trip. But you could use any frame really, even one that is just collecting dust around your home. They make great accents for the various holidays. For this frame, I went with a Thanksgiving theme. My Mom and I recently picked up the new Cricut 'Thanksgiving' cartridge. I ADORE this cartridge!!! I've wanted a Thanksgiving themed one for quite some time and am so glad Provo Craft finally delivered! It is a seasonal cartridge and is so inexpensive! We scored ours on Ebay for...drum roll please....$11.00!!!! This is the first time I've used the cartridge, but I can tell you know, I'll be using it again and again! It is awesome! All of the cuts are pretty basic too. I really like that....it's not confusing at all.
Ok, so the specs for the Gypsy Challenge are:
1. 2 shapes-check (I actually have more than two: pilgrim lady, pilgrim man, pumpkin, Indian corn, 'Give Thanks' title, and the leaf flourish at the top.)
2. 3 Gypsy cuts-check (I have several of those with the base pieces and the layering on them.)
3. 1 item must be welded-check (I welded the pilgrim lady flourish/pilgrim man flourish/pumpkin flourish all together to make one cut.)
4. Must use the color 'orange'-check (I have the use of orange through my pumpkin and leaf. I also stickled these with orange glitter glue.)
5. Mix it with fun-check (Not really sure what this means, but I took it as to have fun with your project...which I certainly did. This is something new, fun, and makes me smile!)
Ok, here is my frame...'Give Thanks'. I used the Helmar Quick Fix Adhesive Runner to adhere the background to a piece of chipboard before adding it to the frame. I also removed the glass since this is a 3-D piece.
(if you want to see it bigger, you can click on the picture and it will come up bigger. Then just hit the back button to return to this post.)

I used my Cuttlebug and 'Victoria' embossing folder on the Pilgrim lady/Pilgrim Man. I also wanted to go kinda non-traditional with the colors on this. I chose a light blue patterned paper, from My Mind's Eye, and a coordinating polka dotted paper for the accents on the pilgrims. I felt this style would match the decor' in my home better.

I did do a bit of trimming on the Pilgrim Man/Pilgrim lady. I wanted to layer them for a 3-D effect. So I cut out the base of all that I welded (pilgrim man flourish, pilgrim lady flourish, and pumpkin flourish) in a solid brown. I then cut them out again and did a bit of trimming to pop them up a layer. I hope that makes sense...LOL.
I used Distress Stickles glitter glue from Tim Holtz (Ranger Industries) on the pumpkin and the leaf. I love the rough texture it gave to these pieces. I also tied a bit of ribbon to the top of the pumpkin. I used Helmar Liquid Scrap Dots to adhere my ribbon. I used the Martha Stewart branch punch for the vines below the pumpkin. Also, you can see on this picture below how I welded all 3 shapes together.
I love all of the sentiments that come with this cartridge! They all look so classy!
I added some Indian corn to the top corners of the frame. I embossed the corn with the 'Tiny Bubbles' embossing folder to make it look more life like. Again, I added a ribbon bow. I adhered the ribbon and the whole cut to the frame with Helmar Liquid Scrap Dots. I'm tellin' ya, if you haven't picked up a tube of these liquid scrap dots, I highly recommend them! They make so many things possible when crafting! I LOVE them!!!! Also, I used Helmar Zap Dots to pop up the 'white' portion of the corn.
I added a leaf flourish cut to the top center of the frame to add in another pop of orange color. Again, I used Helmar Liquid Scrap Dots to adhere this to my frame and Helmar Zap Dots to pop up the leaf. I used some more Distress Stickles on the leaf too.
Here is a view so you can see all of the 'pop dot' action using Helmar Zap Dots.
Also, you know me...totally girly...I added a bit of lace to the Pilgrim Lady to act as a 'apron.' I adhered this with Helmar 450 Quick Dry Adhesive.
More pop dot action...I think I get happy with those things sometimes! ROFL!
I hope you have enjoyed this crafty project! It was so affordable and fun to make! Why not dig up a frame today and alter it for your home? I promise you'll love it!!! Also, if you own a Gypsy and would like to play in this challenge (and there is a prize!!!), go HERE.
Now, yall know how I like to share my other passion (cooking) with ya, right? Well the hubby picked out a new recipe and we cooked it together in the kitchen today for an early dinner. He has to go out to work tonite, so I wanted to feed him before he had to work. It was so much fun cooking in the kitchen together!! He is a big help! He chose another recipe from our favorite chef Giada De Laurentiis. This recipe is called "Pork Chops Stuffed with Sun Dried Tomatoes & Spinach." It was definitely different, but so delicious!!! We both adored it. I am not a big spinach person, but if it's cooked in something like this I love it. Also, this recipe included 2oz. of goat cheese, something neither of us had ever had. Although it is kinda tangy, it really sets off this recipe. That and the thyme, sun dried tomatoes, and sauce to go on top...YUM!!! It was delectable!

You use center cut pork chops for the recipe and cut a little 'pocket' into them. Inside the pocket, you stuff a mixture of yummy goodness! It really accents the pork chops and was fabulous! Then the lemony/mustard sauce on top! Heaven! As you can see in the picture below, I got a little heavy with the sauce...this was my plate and let's just say I'm a big dipper! LOL!

So you wanna try it? I will share the recipe with ya.
Pork Chops Stuffed with Sun Dried Tomatoes & Spinach
Ingredients:
1 tablespoon olive oil, plus 1 tablespoon
2 cloves garlic, minced
6 sun-dried tomatoes, diced
1 (10-ounce) bag of frozen spinach, thawed and excess water squeezed out
1/2 teaspoon salt, plus more for seasoning
1/2 teaspoon freshly ground black pepper, plus more for seasoning
1/4 teaspoon dried thyme
1/4 cup (2 ounces) goat cheese
1/3 cup reduced-fat cream cheese
4 (4-ounce) center-cut pork chops
1 1/2 cups chicken broth
1/2 lemon, zested
2 tablespoons lemon juice
2 teaspoons Dijon mustard
Directions:
Warm the 1 tablespoon olive oil in a medium saute pan over medium heat. Add the garlic and cook until fragrant, about 1 minute. Add the sun-dried tomatoes, spinach, salt, pepper, and thyme. Cook until combined, about 2 more minutes. Transfer the mixture to a medium bowl. Add the goat cheese and the cream cheese. Stir to combine and set aside.
Use a sharp knife to cut a pocket into the thickest portion of the pork chop. Stuff each pocket with 1/4 of the spinach and sun-dried tomato mixture and close the pork around the stuffing. Season the outside of the pork with salt and pepper.
In a small bowl combine the chicken broth, lemon zest, lemon juice, and mustard.
Warm the remaining 1 tablespoon olive oil in a large, heavy skillet over medium-high heat. When the pan is hot add the pork. Cook until golden and cooked through, about 4 minutes per side. Transfer the pork to a side dish and tent with foil to keep warm. Add the chicken broth mixture to the skillet over medium-high heat. Scrape up the brown bits from the bottom of the pan as the chicken broth simmers. Reduce the broth by half to make a light sauce, about 8 minutes. Spoon some sauce over the pork before serving.
If you would like to see Giada's picture and the recipe on Food Network, go HERE. I think mine turned out just as pretty as hers this time. LOL
As always, thanks for stopping by my blog! I hope you all have a fabulous evening! Happy Scrappin'!
Monday, October 18, 2010
Helmar Halloween Howler Hop RAK Winner!!!!
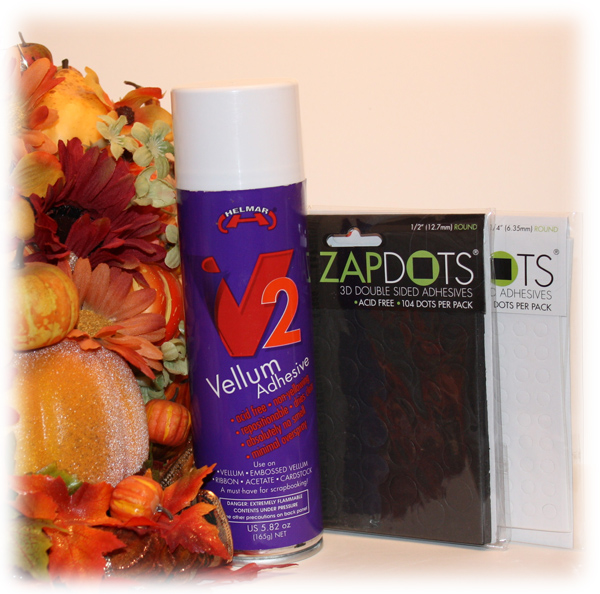
Hey guys! Happy Monday!!! Are we ready for a new week?! For some reason, I have this feeling that this week is going to be long for me. Not sure why, but just feelin' like it is. I hope it will be a good long week though! LOL. I have a doctor's appointment at 9:30 this morning, but I wanted to hop online and blog right quick because I needed to select a winner for the 'Helmar Halloween Howler Hop RAK' from yesterday!!! Woot Woot!!!! The prize is 2 packages of Helmar Zap Dots and Helmar V2 Vellum Spray Adhesive. I adore both of these and I just know the winner will too!

So, there were 118 comments on yesterday's blog post. But one of them was my own, so I put the numbers 1-117 into a 'True Random Number Generator' at Random.org. And the first number that was pulled was.....NUMBER 34!!!!!

So it looks like 'Mary Jean' is our winner!!!! Yay!!! A BIG Congratulations to Mary Jean!
I also want to thank all of you for your kind comments and for hopping along with us in this Helmar blog hop! I think the hop was a huge success! I don't know about you, but I enjoyed every minute of it and it gave me TONS of inspiration!
I hope to get back to my scrappy desk this evening and start creating! So stay tuned for your regular programming...lol! Have a fabulous day!
Happy Scrappin'!
Sunday, October 17, 2010
Welcome To The Helmar Halloween Howler Hop
Hello Everyone! Jeepers, Creepers, it's Sunday and I am so excited!!! Welcome to the 1st Annual Helmar Halloween Howler Hop!!! We are so glad that you decided to join us! Are you ready to scare up some fun?!!! We are and we've got lots and lots of spooktacular projects to share with you! AND lots of ghoulish gifts to give away!!! So put on your frightful Halloween smiles and get ready for a howlin' good time!


Please leave your blog addy or some way I can get in touch with you if you win!!! Thanks!
I want to thank you for hopping along with us for this spooky hop! I hope you have enjoyed this project! I have enjoyed having you at 'A Scraphappy Southernbelle.' Happy Haunting!!!
If you have been following along you should of hopped here from Tanisha's blog. If you happened upon my blog first, hop on back to the Helmar blog to start at the beginning and view some great Halloween/Fall projects and the prizes!!! Make sure you leave some love at each blog along the way for your chance to win BIG!!!
I don't know about you, but I love Halloween! I love all of the fun colors, trick or treaters, and decoration. I love to go outside and take a gander at all of the aforementioned things and come back to my scrappy studio to create. For this hop, I decided to create a Halloween Mask. This is not a 'full face' mask. It is one that is attached to a wooden dowel and you would hold it up to your eyes to delight your fellow ghosties and goblins. Or it could be used as a simple decoration in your home. I love this type of mask. It reminds me of masked costume balls or something. I always like to envision what it would of been like to be an old timey southernbelle in my prettiest, puffy dress...of course escorted by a handsome southern gentleman to a fall ball. Tee Hee! Right up my alley! Here is the mask I have created for the hop:

Now, for this project, I mainly featured two of my absolute FAVORITE Helmar Adhesives: Helmar Liquid Scrap Dots and Helmar 450 Quick Dry Adhesive. But I also snuck in some Helmar Zap Dots!

To begin, I cut all of the pieces for my mask out using my Cricut Expression Electronic cutting machine and Sure Cuts A Lot Software. The svg file for this mask was a freebie from svgcuts.com. It is designed to be a caption for a card or a layout, but I knew when I saw it I had to make a mask out of it.
I cut the base out twice, once using cardstock and then with chipboard for stability. I used the Helmar 450 Quick Dry Adhesive to adhere my cardstock to my chipboard. Oh, Helmar 450 how I adore thee?!!! This adhesive is essential for any scrapbooker! It is quick drying and provides the sturdiest hold ever!!! It doesn't bubble or make the paper curl...just frightfully delightful!

Next, I decided to add some trim to the edges of the mask. I love adding any type of ribbon or lace into a project. It is one of my favorite scrapbooking mediums. So I chose some black grosgrain that coordinated with my mask. I squeezed out just a little strip of Helmar 450 Quick Dry Adhesive at a time and then zigged zagged the ribbon back and forth as shown below. Also, a note...I found that if I squeezed out the adhesive and let it set for just a few seconds it became much more tacky. I then pressed down on the ribbon for like 15 seconds and it was secured perfectly.

I also decided to pull out some pearl ribbon for the edges of the front. I used the same technique with the Helmar 450 Quick Dry Adhesive as above. Simple and effective!

Before I began work on decorating the front of the mask, I squeezed a rather bulky strip of the Helmar Liquid Scrap Dots (shown below) and laid my wooden dowel on top. I wanted to make sure my dowel would stay in place. I then set this aside to dry.

As the Helmar Liquid Scrap Dots dried on the back of my mask, I decorated the front. I added some rhinestones using my Imaginisce I Rock Tool.

I just love the Helmar Liquid Scrap Dots. They too are so versatile and provide great dimension to any project. I used them to pop up my chipboard spider and ghost. I also used them to adhere my squiggly eyes.

I used Helmar Zap Dots (in black) to provide 3 layers of dimension. I popped up the word 'Boo' n the background, the black shadow of the mask, and the orange part of the mask.

Here's an up close view of the ribbon trim. See how the Helmar 450 Quick Dry Adhesive worked wonders?!!! And it doesn't show too bad either.

I wish the hubby would of been home when I snapped pix of this project so I could put it up to my face, but sadly, he was not. So I held it up so you can see how sturdy the Helmar Liquid Scrap Dots worked to hold the dowel in place.

Now, I also wanted to take just a minute to mention another one of my favorite Helmar products...the Helmar Acid Free Remove Cleaner.

This spray cleaner is another positively defrightful product from Helmar! It is acid free and removes adhesive residue left from stickers, tapes, labels, etc. It has a nice orange scent. I use this to clean off my scrapbooking tools, scrapbooking mats, and all around the house. For example, I don't know about you, but my Cricut spatula, scissors, and paper piercer can get pretty icky! Can you see that funky icky-ness on the spatula...eek!

No problem! Just spray a bit of the Helmar Acid Free Remove Cleaner on a paper towel, wipe gently, and voila'! It's like new! Although, if truth be told and this is a funny little story about my hubby, I usually am not the one to do the cleaning. My husband is known as my 'de-icker.' I can be at my desk and say, 'Brandon...ick.' He knows to hop up and grab my Remove and get to cleanin'! LOL. He says he enjoys 'contributing' to my scrappiness!

Another great use...cleaning off your craft mats! I thought my Basic Grey Magnetic Precision mat wasn't so bad, but I noticed some spots of adhesive. Look at what I was able to remove!

ALSO, I have a Helmar prize pack I would like to give away during the hop as well. All you have to do is leave me a comment on this post and you're entered to win the goodies below!!!
2. Helmar Zap Dots-Black, 1/2" round
3. Helmar Zap Dots-White, 1/4" round
Please leave your blog addy or some way I can get in touch with you if you win!!! Thanks!
I want to thank you for hopping along with us for this spooky hop! I hope you have enjoyed this project! I have enjoyed having you at 'A Scraphappy Southernbelle.' Happy Haunting!!!
Next stop on the howlin' hop...the frightfully creative Cathy!!! Click on the picture below to be directed to her blog!
Happy Scrappin'!
Subscribe to:
Posts (Atom)