A Scraphappy Southernbelle

Monday, October 31, 2011

Lets Get This Party Started!!!

Hey y'all! Happy Monday! Happy Halloween! I hope you all had a wonderful weekend! We have got a fabulous week lined up for you at My Craft Spot! This week Kimberly is revealing not 1, not 2, but 5 BRAND NEW Christmas/Winter Stamp Sets!!! Whoo hoo!!! Believe me, they are all so adorable! To celebrate, we are having a week long party! Each day of this week (Monday-Friday) we will reveal 1 new stamp set each day. The whole DT created projects with each stamp set, so you'll be able to get lots of festive ideas. Then, on Saturday we will be having a blog hop to cap off the party. Kimberly is giving away prizes all week long and we will have lots more goodies to give away for the blog hop. So if you would like a chance at the goodies and to see all the crafty inspiration...go HERE or click on the picture below to view the My Craft Spot blog!!! Be sure to visit every day for ideas/prizes! Woot Woot! 
Of course, I am going to share my projects with you each day that I have created here on my own blog. So let's get to it...

The first stamp set that is being debuted is the "Jingle All The Way" stamp set. This set is super cute and has lots of great sentiments for those holiday projects! I decided to use the stamp set on a card.

"No Peeking"

Supplies Used
Cardstock: The Paper Stuio, Core'dinations, GCD Studios
Patterned Paper: Cosmo Cricket
Steam Binding, Twine, Stamps: My Craft Spot
Face Stamp: Peachy Keen
Ink: Versamark (Tsukineko)
Corner Punch: EK Success
Electronic Cutter: Cricut Expression (Provo Craft)
Software: Cricut Gypsy (Provo Craft), Sure Cuts A Lot (Craft Edge)
Cartridge: Home Accents
SVG's: My Scrap Chick (Bella/Baxter Elves, 30 Boxes & More)
Adhesive: Helmar

I stamped on the 'No Peeking' and 'Do Not Open' using the new stamp set.
 Isn't little Miss Bella Elf so cute? I just love this SVG set. She's sitting on top of the giftbox, but it looks like she is taking a peek. Tee hee!
 I also used the new stamp set to stamp my sentiment on the inside of the card.
I hope you guys have enjoyed this card! Be sure to hop on over to the My Craft Spot blog if you would like to see all of the designers projects in one place! We'd love to have you visit!

See you guys tomorrow! Enjoy your day and 'Thank You' for stopping by my blog!
Happy Scrappin'!!!
Pin It!

Wednesday, October 26, 2011

Chris Kit

Hey guys! Check out this awesome 'Breast Cancer Awareness' fundraiser from Creative Charms!

Chris' Kit is now on sale. For the rest of this month all net proceeds from all sales on our website will go to the Susan Komen for the Cure in Chris Hertel's name. To help raise breast cancer awareness we are offering a pink kit in honor of Chris.

Chris was a dear friend and colleague with Creative Charms. She was our designer for the catalog and packaging. Last July Chris lost her battle with breast cancer. She left behind a loving and dedicated husband and two fabulous children along with two her dogs. Her family was her joy and inspiration. The net proceeds from this kit will go to the Susan Komen for the Cure to help find a cure for this terrible disease so that no other families will lose their wives and mothers (Chris' wish).

Chris' Kit Includes:
  • Pink 3D Sparkly Butterfly Garden Brads - 12 Pieces
  • Pink Sunflowers - 4 Pieces
  • Violet Vintage Jewels - 12 Pieces
  • Pink Vintage Jewels - 12 Pieces
  • White with Pink Sparkled Flowers - 6 Pieces
  • Pink Sparkled Butterflies - 2 Pieces
  • Pink Sequin and Felt Flowers - 3 Pieces
  • Pink Sheer Flowers - 6 Pieces
A $23.21 value for $9.99.

Have a great day everyone!
Pin It!

Color Splash

Hey y'all! Happy Wednesday! How are ya doing on this festive fall day? I hope you are enjoying this beautiful weather! This is my favorite time of year!

I have a new post going up on the Momenta blog today and thought I would share my projects with you guys here as well. I was driving home the other day and noticed all of the bright color in the trees on the mountain near our home. It really spoke to me and I sat down to create with the colorful 'Kaleidoscope Collection' from Momenta as soon as I got home. Here is what I came up with:

"Best Friends"

Supply List
Cardstock: Momenta, The Paper Studio
Patterned Paper, Pre-Cut Card Base, Rhinestones, Stickers: Momenta
Punch: Creative Memories
Adhesive: Helmar
 I created a mosaic pattern by punching out the hexagons with leftover patterned paper. I added bling and a clear layered sticker to them for added interest.
 I added a sticker to the inside to finish off the card.
 "You & Me...Always"

Supplies Used
Cardstock: Die Cuts With A View, The Paper Company
Patterned Paper, Pre-Cut Card Base, Stickers, Rhinestones: Momenta
Border Punch: Martha Stewart Crafts
Adhesive: Helmar
 Love these clear layered stickers from Momenta! They add great dimension!
I finished off the inside of the card with more patterned paper, cardstock, and a sticker. I think I'll give this one to my hubby one day.
 "Get Well"

Supplies Used
Cardstock: The Paper Studio, Momenta
Patterned Paper, Pre-Cut Card Base, Stickers, Rhinestones: Momenta
Adhesive: Helmar
 With flu season coming up, I thought I better have some 'get well' cards on hand just in case.
 Again, finished off the inside with more paper and a sticker.
I hope you have enjoyed these cards and that they will inspire you to have a 'color splash' of your own! As always, thanks for visiting my blog! I hope to see you again soon!

Happy Scrappin'!!!
Pin It!

Monday, October 24, 2011

It's A Boy

Hey y'all! Happy Monday! I hope you all are having a fabulous day so far! I have a new post going up over at the "She's A Sassy Lady" blog today and I thought I would share it with you guys here as well. For my project, I created a card to send to my brother and sister-in-law. As I mentioned a while back, they are expecting their 2nd baby and we are all soooo excited! Well, we found out this week they are having another boy! Carter will have a little brother! How awesome is that?! We can't wait to welcome this new little one into our family!

In the meantime though, I wanted to send them a little card congratulating them on finding out it was a boy. I didn't want to go with the classic blue tones you usually see on baby boy cards though, so I went with a lime green and gray color scheme. I just adore these colors together! I hope they will like it! I used my Gypsy to design the card and cut it out using my Cricut. Here is my project:

"It's A Boy" Card

Supplies Used
Cardstock: The Paper Studio, Bazzill Basics Paper
Patterned Paper: First Edition Paper
Pearls: Queen & Co.
Button: The Paper Studio
Glitter Glue: Stickles (Ranger Industries), Eucalyptus
Electronic Cutter: Cricut Expression (Provo Craft)
Software: Cricut Gypsy (Provo Craft)
Cartridges: Gypsy Font, Gypsy Wanderings, New Arrival
Adhesive: Helmar
 I used some twine from My Craft Spot to tie a bow to add to the top of the bottle in the background. The bottle is from the Gypsy Wanderings Cartridge. The shape of the card is from the Gypsy Font Cartridge.
 This adorable border is from the Gypsy Wanderings Cartridge. I used pop dots to pop it up for added dimension and then added some Stickles to it.
 For the inside of my card, I cut out my sentiment from the New Arrival Cartridge.
 And I finished off the back with more coordinating patterned paper and my custom stamp.
I hope you have enjoyed this project. It was really easy and fun to create! I made this card in a little over an hour, so not too bad. Thank you for dropping by my blog and I hope to see you again soon! Enjoy your day!

Happy Scrappin'!!!
Pin It!

My Craft Spot Challenge #31-'See Through Projects'

Hey guys! Happy Monday! I hope you all had a great weekend! Today, we have another fun challenge for you at My Craft Spot! This weeks challenge...'See Through Projects.' We are creating projects that have some 'see through' aspect to them. You can use acetate, transparency, vellum, etc. We just want to see through it! I hope you'll hop on over and join us for the challenge! There is a prize up for grabs! Woot Woot! Go HERE to visit the My Craft Spot blog.

For my project, I created a little cookie box for the hubby. He loves to take cookies in his lunch box for a little sweet treat while on the train, so I thought I'd sneak this in for his next trip. Tee hee! I used my Cricut, Sure Cuts A Lot Software, and files from My Grafico to cut this cookie box. If you are interested in this box, go HERE to see that. To close up the opening that was cut so that you can see into the box, I used leftover transparency sheet that you can find in any office supply store. I did not have acetate, so this worked great in a pinch. I then added lots of goodies from My Craft Spot to jazz it up.

"Hello" Cookie Box

Supplies Used
Cardstock, Button: The Paper Studio
Patterned Paper: Momenta
Stamp, Crinkle Ribbon, Twine: My Craft Spot
Pearls: Queen & Co.
Border Punch: Martha Stewart Crafts
Ink: Stampin' Up!
Transparency: Hammermill
Electronic Cutting Machine: Cricut Expression (Provo Craft)
Software: Sure Cuts A Lot (Craft Edge)
SVG's: My Grafico
Adhesive: Helmar
I added his favorite, Chips Ahoy Chunky Chocolate Chip cookies to the inside. And yes, I snuck one and munched on it while scrappin'! LOL!
I used the crinkle ribbon to tie the box shut. It has a little flap that closes, but I didn't want it to open while he is transporting his lunch box.
Do hop on over and join us for the challenge! We'd love to see what you can create!

Thanks for dropping by my blog!
Happy Scrappin'!!!
Pin It!

Wednesday, October 19, 2011

After Bathy Time...

Hey y'all! Happy Wednesday! I hope you all are having a fabulous week! We are settling in quite nice with our new furbaby, Katie Scarlett. I haven't got to scrap all week, but I hope to do so tomorrow. We've been spending our days with the pup, so you'll have to excuse the non-scrappyness. I promise to be back asap! I just want to acclimate her to us as much as I can. Hopefully tomorrow she is going to learn to play in her exercise pen while Mommy scraps. Tee Hee!

Anyways, Katie Scarlett has her first vet appointment with us Friday and since Daddy is going out to work tonight, I thought it would be a good time for a bathy. She did so good! And now she smells like a sweetie pie! So cute and fluffy!
 After bath time, she snuggled up next to Mommy and dozed off. Precious little angel!
 Is their anything more precious than a sleeping pup?! :)
 From the front...
Have a great evening everyone! Scrappy Hugs!
Pin It!

Saturday, October 15, 2011

Berry Bleu Design Team Reveal

Hey guys! Happy Saturday!!! I hope you all are having a fabulous weekend! We are having a awesome time here in the Gandy household! As many of you know, we picked up our adorable furbaby yesterday! She is such a little cutie! So well behaved, playful, sweet, and just a joy in the house! She is adjusting very well and we already feel like she has been here for a really long time. We just love her! I'll be sharing pix and video asap, so stay tuned!

In the meantime, I wanted to share some DT work with you guys. We are revealing our 2nd DT projects for the month over at Berry Bleu blog! Marivic, the owner of Berry 71 Bleu, makes the most GORGEOUS tags!!! If you can, do hop on over to the Berry Bleu Blog and see the marvelous creations my fellow DT sisters have created! They are phenomenal! You can see that HERE.

For my project, I have created a piece of home decor' for a good friend. I will be giving this to her and her family for Christmas. The 'N' stands for their last name and the theme is perfect for her home. The inspiration started with the fabulous tag that Marivic created. I knew when I saw it that it was perfect for a gift for my friend. I bought the charger plate at Hobby Lobby. It has some great texture on it. I then added misc. embellishments.

"Altered Charger"

Supplies Used
Cardstock: Core'dinations
Patterned Paper: K&Company
Handmade Tag: Berry71Bleu
Rhinestones: Studio 18
Charger, Ribbon Trim: Hobby Lobby
Dragonflies, Brown Emellishments: Wal-Mart (got these in the Christmas section)
Electronic Cutter: Cricut Expression (Provo Craft)
Software: Cricut Gypsy (Provo Craft), Gypsy Font cartridge
Adhesive: Helmar


 Isn't the tag unbelievably cute?!! Marivic has such a talent for creating unique pieces!
 Picked up these embellishments in the Christmas section at Wal Mart for 99 cents for 6!
 Another Wal Mart Christmas section find....59 cents a piece.
Thanks for stopping by my blog! I hope you have a wonderful weekend!
Happy Scrappin'!!!

P.S. AND I am so excited to announce that I made the Creative Charms DT!!! I can't wait to work with their awesome stuff! Check out their site! It's wonderful! You can see that HERE.

Pin It!

Friday, October 14, 2011

"I'm The Big Brother" Notecard Gift Set

Hey guys! Happy Friday! Well, today is the BIG DAY!!! We go to pick up our new furbaby and I am sooooo EXCITED!!! I'll be sure to share lots of pix and hopefully some video. So stay tuned for one of the cutest furbabies you ever did see! Tee Hee!

In the meantime, I have a new project to share with you guys today. I've got a blog post going up over at the Momenta blog today and thought I'd share my project with you guys here as well. This project is for my sweet little nephew, Carter. As many of you know, Carter is going to be a new big brother this coming April! Our whole family is so excited and cannot wait to meet the new baby. Carter says he is going to take good care of 'his baby.' LOL! So I thought I'd make him a little notecard gift set so that he can send out cards to announce he is a new big brother.

I cut this notecard box out using my Cricut, Sure Cuts A Lot software, and a svg file from 'My Grafico.' The file is for a recipe card box, but works great for notecards as well. If you are interested in that file, go HERE to see that. I jazzed up the box and notecards with lots of yummy goodies from Momenta.

"I'm The Big Brother"

Supplies Used
Cardstock: Core'dinations, The Paper Studio, Die Cuts With A View
Patterned Paper, Stickers, Bling: Momenta
Twine: My Craft Spot
Lace: Hobby Lobby
Border Punch: Fiskars
Corner Punch: EK Success
Scallop Punch: Marvy Uchida
Adhesive: Helmar
 To show the dimension...
 When you open up the box, there are 5 cards inside.
 Card #1
 Card #2
 Card #3
 Card #4
 Card #5
Y'all have a fabulous weekend! Happy Scrappin'!!!
Pin It!

Monday, October 10, 2011

My Craft Spot Challenge #29-Color Challenge

Hey y'all! Happy Monday! I hope you all had a fabulous weekend! I am SOOO Excited for this week! If you don't already know...I am becoming a Mommy this week! Yep, you heard me right! I, and my husband, are the proud new parents of a adorable little 'furbaby!' We are adopting a Yorkshire Terrier named Katie Scarlett! We pick her up on Friday and I cannot wait!!! I hope the week flies by!

In the meantime though, I shall try to occupy myself with crafty things. First up, we have another fun challenge at My Craft Spot. This weeks challenge is a Color Challenge. The challenge is to use the color black with orange, purple, OR green! Super easy and so fun! I hope you'll hop on over to My Craft Spot and join us for the fun! We'd love to see what you can do AND there is a prize up for grabs! Yay!

For my card, I decided to go with a black and orange theme...one of my favorite color combo's for the Halloween season!
Now, before I tell you about the card, I have to tell you about the inspiration. Have you guys ever seen those 'topsy turvy' cakes? They are so adorable! The layers of the cake are lopsided. I keep telling my Momma that when I have a real baby one day (hopefully) that I want one of these kinds of cake at my shower. Tee Hee! Check out this one I found by doing a search online. This is the inspiration for my card. How festive is this?!!!
 And my take on it....

"Halloween Cake" Card

Supplies Used
Cardstock: The Paper Studio
Patterned Paper: Pink Paislee, Die Cuts With A View
Crinkle Ribbon, Twine, Stamp: My Craft Spot
Bling: Momenta
Pins: source unknown (got these last year and cannot remember the mft.)
Ink: ColorBox (Clearnsap), Stampin' Up!
Circle Cutter: Creative Memories
Electronic Cutting Machine: Cricut Expression (Provo Craft)
Software: Sure Cuts A Lot (Craft Edge)
SVG's: My Scrap Chick, Aleisha Davis Designs
Adhesive: Helmar

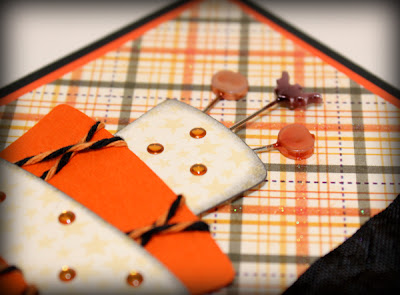
For this card I started with a card base that I cut with my Cricut, SCAL, and SVG's from My Scrap Chick. The set was called 'Card Essentials 2' and  you can find that HERE if you are interested. I then cut the 'topsy turvy' cake. I found this online for free from the Aleisha Davis Designs blog. HERE is the link for the topsy turvy cake if you are interested in that. I jazzed up my cake a bit with twine to act as 'icing' and some bling stickers. Then I added the pins to the top.
 Here is a close up of my cake. I popped it up off the card a tad using Liquid Scrap Dots.
 I curled up the edges of the scalloped borders for added dimension.
 Here is my pins. 2 of them are pumpkins and 1 is a bat.
 Here is a view of the inside where I stamped my sentiment.
I hope you have enjoyed this card! It was so fun to make and left me with a craving for cake! LOL!

Thanks for dropping by my blog! Have a great day!
Happy Scrappin'!!!
Pin It!

Saturday, October 8, 2011

Personalized Doggie Goodies

Hey guys! Happy Saturday! Ok, I know it's silly but I just had to do it! Personalize a few of our new doggy's thingies that is! Tee Hee! First, I added her monogram to her clear placemat. I got the placemat at PetSmart and her ceramic food/water bowls at Petco. I cut her initials out using my Cricut, SCAL, and outdoor vinyl from H&H Supply.
 Holy Cuteness I love these bowls! Her space (affectionately coined the doggy condo) is going to be in a black/pink theme!
 I used the same vinyl to add a doggie bone onto the back of this brush...
 and some little paws on this one!
Sorry, couldn't help myself!

Have a good one y'all! Enjoy your weekend!
Pin It!