http://labeltulip.blogspot.com/2009/04/paper-casting-with-your-stamps.html
Isn't her tutorial fabulous?! I can't wait to try this with some of my stamps!!!
Well, while I was looking at this, I got to thinking...hmmmm....I wonder if I can do this with my Cuttlebug folders??!!! The answer....Yes you can! And here is how:
You will need the following: (and the great thing about this technique is that it is cost efficient!!! We all have these items readily available in our own homes, so no running to the store to buy something.)
1. Cuttlebug folder of your choice ( I did 2; one with Script and one with Houndstooth)
2. 8-10 squares of toilet tissue (any brand will do)
3. Water (I used a mini spray bottle)
4. Paper Towels

You will want to lay the sheets of toilet tissue on top of one another. I used 9 sheets for my first try.

I decided to lay my sheets of tissue on a plate to keep from getting water everywhere.

Next, pull out your spray bottle and spritz the sheets of tissue until they are thoroughly wet. I turned mine over once and used my fingers to press down to make sure I got it really moist.

Next, you will want to gently pick up your tissue and lay it onto the Cuttlebug folder.
Now, using your fingertips, begin pressing down your tissue into the image on the Cuttlebug folder.
When you are done, it will look like this....
Now, while it is wet, you will want to tear the edges of the tissue.
Next, using a paper towel, press into the image to soak up all the water that you possibly can. This also helps to define your image even more.
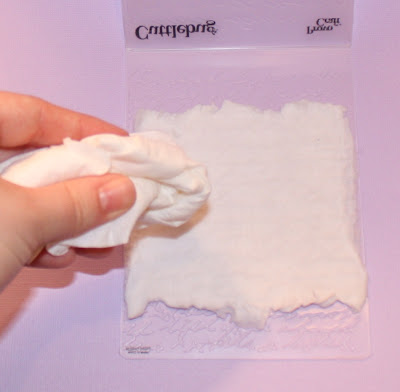
Very gently, pull your tissue away from the Cuttlebug folder...
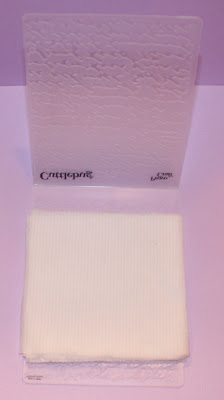
Flip it over and this is what it will look like.....
You will want to let this dry completely. As it dries, the paper will puff up and curl a tad. I wish we had 'touch-a-vision'! LOL. These feel so cool!!!! It will look like this when you are done....
Once these are dry, you can color them with chalks, glimmer mist, etc. Or you could just leave them as is. They are beautiful either way. I decided to color mine with brown chalk for a distressed look. Here is the card I made using this new technique:
Yall this is so fun! I hope you will give it a try!
Thanks for stopping by! Have a great evening!!!






22 comments:
Wow Aymee! That looks great! :D LOVE that you inked it in brown! No one'd ever know it was TP! lol!
Well this is so awesome!!! and you once again have given perfect directions!! only problem....i wanted to have an excuse to run to J's LOL :D
OMG.. this is wonderful...embossed TP.. how creative and fun. great job Aymee. thanks for sharing and posting a tutorial
What a great way to use TP...how did you ever think of that...nevermind!! LOL!! This is fabulous..I will definately need to try this...great blog by the way and love that cupcake card!!!
That turned out great Aymee! I think it looks like really expensive embossed paper! Great card too!
I am most definitely going to have to try this.
Seriously great job! Thanks for the easy to do tutorial and the great pics!
omg! this is so stinkin cool! I've recently been hooked on these embossing folders with my big shot!
Thank you!
can I post about your tuitorial on my blog? I'll link it back to you!
WOW Aymee - that is just AMAZING!!! I can't believe the finished product (which is just GORGEOUS) is TP!!!! Thanks so much for sharing with us!!!
FAB job with this!!
woohooo this looks awesome!!
Aymee, I love this technique that Dani posted. Thanks for sharing another example using the texture plates. Awesome card! So pretty.
WOW all that with TP - too cool and thanks for sharing!!!
Awesome! I will definitely have to try this! Thanks for sharing!
very awesome!! Love that you tried the Cuttlebug folders, I'll have to remember that! =) Your card turned out gorgeous!
danielle
I saw this on Dani's blog, and need to try this. I love how you used the Cuttlebug folders Aymee! That card is so beautiful!!!
-Karen
I came here from Michelle's blog and so glad I did - wonderful technique, thanks for sharing. I also like your ribbon tutorial too.
Aymee,
This Tutorial is awesome. It looks like alot of fun. I love your card at the end of it. I may try this one. Thank you very much!!!
What a neato technique! Two fabulous tutorials in one day! Keep it up sister! This is fantastic! Hugs, D
that is so neat!!!! I can barely wait to try it. That would be a great idea to have the students in my classroom to do for their mother's day card.
Yah!!!!
this is so awesome! Definately giving this one a try!
this is basically like paper making on a small scale, now you should move onto your junk mail lol! If you pm me I can give you some handmade paper making tips. It's a lot of fun and they even sell an additive to make the paper you make acid free
Post a Comment