http://www.splitcoaststampers.com/resources/tutorials/backpackbox/
I then used my Cricut and the following carts for the rest:
1.Paper Doll Dress Up
2. Doodlecharms
3. Stretch Your Imagination
4. Plantin' Schoolbook
5. Cuttin' Up
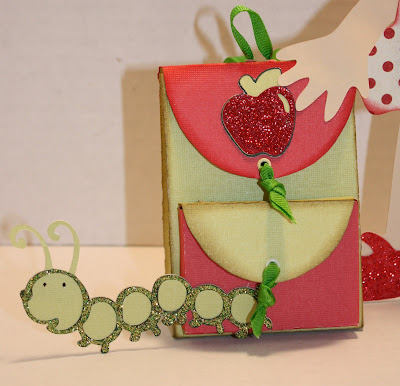
I added some Stickles glitter glue, ribbon, and some bling. Here it is:

I used some velcro adhesive dots for the 2 flaps on the backpack. I hid a bookmark for Mom down inside the backpack. Here is a pic so you can see what it looks like opened up.

To show the dimension. Aren't those little backpack straps the cutest!!! I'm tellin' yall, you gotta make this little backpack. I was gigglin' the whole time! Hee hee!
I curled the edges of the sun.

I added some ribbon for a bow in her hair and some bling for little earrings. I also added chalk for blush on her cheeks.


9 comments:
Wow, this is an amazing project! I do have a bit of a bone to pick though, as I've only been on vacation for two weeks.....it's too early for back to school!!!!
That is the cutest thing! I absolutely love it! So will my students! Thanks, you are the BEST!
This is so adorable, Aymee!!! Thanks for the link to the instructions :~)
This is just tooooo cute! That back pack looks amazing. Great job!
Hugs
Kaye x
How incredible! I'll have to give my Cricut some love. You've done amazing things with yours. I can't believe adorable this this! :O)
Aymee,
This doll is really cute. Your so good with the paper dolls. The back pack is adorable also.
Great job Aymee - I just can't get those paper dolls to look that cute (and sh'e a cutie!)...Kris
Awesome project! I'm sure your mom will love it!
I just found your blog, and this project, and it is FANTASTIC!!!!! I absolutely love it, and must make one!!! LOL
You do beautiful work! Am looking forward to visiting back often.
thank you!
Post a Comment