A Scraphappy Southernbelle

Saturday, October 15, 2011

Berry Bleu Design Team Reveal

Hey guys! Happy Saturday!!! I hope you all are having a fabulous weekend! We are having a awesome time here in the Gandy household! As many of you know, we picked up our adorable furbaby yesterday! She is such a little cutie! So well behaved, playful, sweet, and just a joy in the house! She is adjusting very well and we already feel like she has been here for a really long time. We just love her! I'll be sharing pix and video asap, so stay tuned!

In the meantime, I wanted to share some DT work with you guys. We are revealing our 2nd DT projects for the month over at Berry Bleu blog! Marivic, the owner of Berry 71 Bleu, makes the most GORGEOUS tags!!! If you can, do hop on over to the Berry Bleu Blog and see the marvelous creations my fellow DT sisters have created! They are phenomenal! You can see that HERE.

For my project, I have created a piece of home decor' for a good friend. I will be giving this to her and her family for Christmas. The 'N' stands for their last name and the theme is perfect for her home. The inspiration started with the fabulous tag that Marivic created. I knew when I saw it that it was perfect for a gift for my friend. I bought the charger plate at Hobby Lobby. It has some great texture on it. I then added misc. embellishments.

"Altered Charger"

Supplies Used
Cardstock: Core'dinations
Patterned Paper: K&Company
Handmade Tag: Berry71Bleu
Rhinestones: Studio 18
Charger, Ribbon Trim: Hobby Lobby
Dragonflies, Brown Emellishments: Wal-Mart (got these in the Christmas section)
Electronic Cutter: Cricut Expression (Provo Craft)
Software: Cricut Gypsy (Provo Craft), Gypsy Font cartridge
Adhesive: Helmar


 Isn't the tag unbelievably cute?!! Marivic has such a talent for creating unique pieces!
 Picked up these embellishments in the Christmas section at Wal Mart for 99 cents for 6!
 Another Wal Mart Christmas section find....59 cents a piece.
Thanks for stopping by my blog! I hope you have a wonderful weekend!
Happy Scrappin'!!!

P.S. AND I am so excited to announce that I made the Creative Charms DT!!! I can't wait to work with their awesome stuff! Check out their site! It's wonderful! You can see that HERE.

Pin It!

Friday, October 14, 2011

"I'm The Big Brother" Notecard Gift Set

Hey guys! Happy Friday! Well, today is the BIG DAY!!! We go to pick up our new furbaby and I am sooooo EXCITED!!! I'll be sure to share lots of pix and hopefully some video. So stay tuned for one of the cutest furbabies you ever did see! Tee Hee!

In the meantime, I have a new project to share with you guys today. I've got a blog post going up over at the Momenta blog today and thought I'd share my project with you guys here as well. This project is for my sweet little nephew, Carter. As many of you know, Carter is going to be a new big brother this coming April! Our whole family is so excited and cannot wait to meet the new baby. Carter says he is going to take good care of 'his baby.' LOL! So I thought I'd make him a little notecard gift set so that he can send out cards to announce he is a new big brother.

I cut this notecard box out using my Cricut, Sure Cuts A Lot software, and a svg file from 'My Grafico.' The file is for a recipe card box, but works great for notecards as well. If you are interested in that file, go HERE to see that. I jazzed up the box and notecards with lots of yummy goodies from Momenta.

"I'm The Big Brother"

Supplies Used
Cardstock: Core'dinations, The Paper Studio, Die Cuts With A View
Patterned Paper, Stickers, Bling: Momenta
Twine: My Craft Spot
Lace: Hobby Lobby
Border Punch: Fiskars
Corner Punch: EK Success
Scallop Punch: Marvy Uchida
Adhesive: Helmar
 To show the dimension...
 When you open up the box, there are 5 cards inside.
 Card #1
 Card #2
 Card #3
 Card #4
 Card #5
Y'all have a fabulous weekend! Happy Scrappin'!!!
Pin It!

Monday, October 10, 2011

My Craft Spot Challenge #29-Color Challenge

Hey y'all! Happy Monday! I hope you all had a fabulous weekend! I am SOOO Excited for this week! If you don't already know...I am becoming a Mommy this week! Yep, you heard me right! I, and my husband, are the proud new parents of a adorable little 'furbaby!' We are adopting a Yorkshire Terrier named Katie Scarlett! We pick her up on Friday and I cannot wait!!! I hope the week flies by!

In the meantime though, I shall try to occupy myself with crafty things. First up, we have another fun challenge at My Craft Spot. This weeks challenge is a Color Challenge. The challenge is to use the color black with orange, purple, OR green! Super easy and so fun! I hope you'll hop on over to My Craft Spot and join us for the fun! We'd love to see what you can do AND there is a prize up for grabs! Yay!

For my card, I decided to go with a black and orange theme...one of my favorite color combo's for the Halloween season!
Now, before I tell you about the card, I have to tell you about the inspiration. Have you guys ever seen those 'topsy turvy' cakes? They are so adorable! The layers of the cake are lopsided. I keep telling my Momma that when I have a real baby one day (hopefully) that I want one of these kinds of cake at my shower. Tee Hee! Check out this one I found by doing a search online. This is the inspiration for my card. How festive is this?!!!
 And my take on it....

"Halloween Cake" Card

Supplies Used
Cardstock: The Paper Studio
Patterned Paper: Pink Paislee, Die Cuts With A View
Crinkle Ribbon, Twine, Stamp: My Craft Spot
Bling: Momenta
Pins: source unknown (got these last year and cannot remember the mft.)
Ink: ColorBox (Clearnsap), Stampin' Up!
Circle Cutter: Creative Memories
Electronic Cutting Machine: Cricut Expression (Provo Craft)
Software: Sure Cuts A Lot (Craft Edge)
SVG's: My Scrap Chick, Aleisha Davis Designs
Adhesive: Helmar

For this card I started with a card base that I cut with my Cricut, SCAL, and SVG's from My Scrap Chick. The set was called 'Card Essentials 2' and  you can find that HERE if you are interested. I then cut the 'topsy turvy' cake. I found this online for free from the Aleisha Davis Designs blog. HERE is the link for the topsy turvy cake if you are interested in that. I jazzed up my cake a bit with twine to act as 'icing' and some bling stickers. Then I added the pins to the top.
 Here is a close up of my cake. I popped it up off the card a tad using Liquid Scrap Dots.
 I curled up the edges of the scalloped borders for added dimension.
 Here is my pins. 2 of them are pumpkins and 1 is a bat.
 Here is a view of the inside where I stamped my sentiment.
I hope you have enjoyed this card! It was so fun to make and left me with a craving for cake! LOL!

Thanks for dropping by my blog! Have a great day!
Happy Scrappin'!!!
Pin It!

Saturday, October 8, 2011

Personalized Doggie Goodies

Hey guys! Happy Saturday! Ok, I know it's silly but I just had to do it! Personalize a few of our new doggy's thingies that is! Tee Hee! First, I added her monogram to her clear placemat. I got the placemat at PetSmart and her ceramic food/water bowls at Petco. I cut her initials out using my Cricut, SCAL, and outdoor vinyl from H&H Supply.
 Holy Cuteness I love these bowls! Her space (affectionately coined the doggy condo) is going to be in a black/pink theme!
 I used the same vinyl to add a doggie bone onto the back of this brush...
 and some little paws on this one!
Sorry, couldn't help myself!

Have a good one y'all! Enjoy your weekend!
Pin It!

Tuesday, October 4, 2011

2 New Halloween Cards

Hey y'all! Happy Tuesday! I am SOOOO Excited today because it's my BIRTHDAY!!! Woot Woot! I am 28 years old today! Eeek! Before you know it, it'll be the big 3-0! But it's all good! Just glad to be here! AND the best part of my birthday is that I'm not alone! IDK if any of you know this but I've spent about the last 4 birthdays alone. We had moved to PA and the hubby had to work all day on each of my previous birthdays for the past few years! It was kinda depressing, but he is home today! Yay! AND I'm hoping my present will be something that barks! LOL! I've got my eyes set on a Yorkie! We'll see! Stay tuned!

Anyways, on to the scrappyness! I have 2 new Halloween cards that I made last week for one of my favorite SVG stores...My Scrap Chick!!! I just adore their files! They are so fabulous! These new files are card fronts that coordinate with their holiday treat bags! How cool is that! So here is what I came up with...

"I Want Candy"

Supplies Used
Cardstock: The Paper Studio, Bazzill Basics Paper
Patterned Paper: Die Cuts With A View
Twine: My Craft Spot
Stickers: Momenta, Making Memories
Buttons: American Crafts, others from my scrappy stash
Corner Punch: EK Success
Electronic Cutter: Cricut Expression (Provo Craft)
Software: Sure Cuts A Lot (Craft Edge)
SVG's: My Scrap Chick
Adhesive: Helmar
 I added a few color coordinated buttons on top of my candy corn sections to add some dimension.
 Here is the inside of my card. The stickers that say 'I Want' are from Making Memories and the word 'Candy' is from Momenta. I also added a strip of leftover patterned paper to the inside for a pop of color.
 "Happy Halloween"

Supplies Used
Cardstock: The Paper Studio, Core'dinations
Patterned Paper: Die Cuts With A View
Stickers: Momenta, Making Memories
Twine: My Craft Spot
Thread: Coats & Clark
Trim: Hobby Lobby, Fancy Pants Designs
Electronic Cutter: Cricut Expression (Provo Craft)
Software: Sure Cuts A Lot (Craft Edge)
SVG's: My Scrap Chick
Adhesive: Helmar
Other: sewing machine

To make the candies, I cut out the candy centers and wrapped twine around in a circle. I then popped these up using pop dots for added dimension.
 For the inside of the card, I used a bit of the 'negative' cut I had left on my Cricut mat after I peeled off the card front.
I hope all of you have a fabulous day! Thanks for stopping by my blog! I hope to see you again soon!

Happy Scrappin'!!!
Pin It!

Saturday, October 1, 2011

Welcome To The 'Momenta World Card Making Day Blog Hop!!!'


***NOTE: If you are interested, check out the post BELOW this one for the Berry Bleu Pages & Tags Blog Hop! There is a PRIZE up for grabs as well!!!***


Hey y'all! Happy Saturday! I hope you all are having a fabulous weekend so far! Happy World Card Making Day to all of you crafters out there!

To celebrate World Card Making Day, Momenta is hosting a blog hop in hopes of inspiring your creativity with our fabulous products! If you are visiting my blog for the first time and would like to start at the beginning of the hop, go HERE to visit the Momenta blog and to get all the details of the hop. There are some fabulous Momenta prizes up for grabs! Woot Woot!!!

We hope that you have lots of fun and enjoy the wonderful creations from our Design Team!

For my project, I used the 'Formal Affair' Boxed Card Kit from Momenta. This card kit is so fabulous! It is stuffed full of scrappy goodies! The kit comes with 12 cards and envelopes, assorted cardstock stickers, borders, and gems!
First I decided to decorate the outside of my box to personalize it a bit. I just love the boxes that these card kits come in! They all have an attractive pattern on the outside and are very sturdy! So when the cards have all been sent out, I'll have this nifty little box to store things in my scrappy studio! Here is my altered card box:
 I cut patterned paper from Momenta for the medallion shape in the background. I then added some flourish stickers. For the center, I cut 2 scallop circles (both out of Momenta cardstock) and popped them up on pop dots. I added an 'A' for my initial, a floral clear layered sticker, and some bling stickers.
 Love the clear layered stickers from Momenta! They provide great dimension!
 After decorating my card box, I decorated each of the 12 cards that came in the box with coordinating supplies from Momenta. Here are my 12 cards...

"Together Forever"
 "Just A Note"
 "Birthday Gifts"
 "HB" (Happy Birthday)
 "Hello"
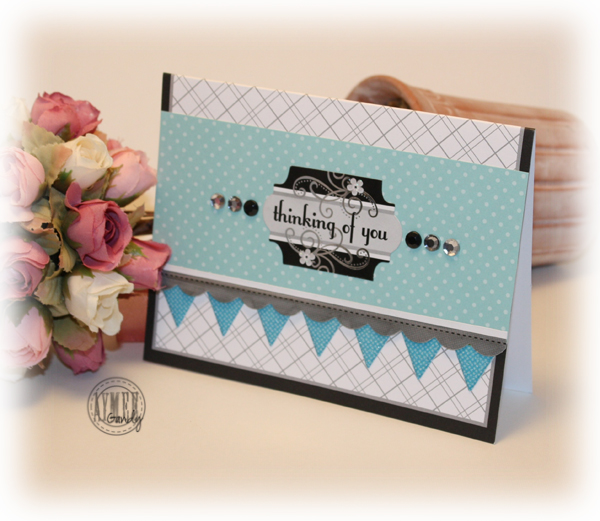
 "Thinking Of You"
 "Wedding"
 "Hi There"
 "If I Had A Flower..."
 "Miss You"
 "Hello"
 "Love"
Momenta Supplies Used :
NC-1363 FOR Card Kit
ST-2962 BLT Pfy Flourish
ST-4759 C&C Pfy Borders Boy
ST-2039 Turq Puffy Glitter Alpha
ST-1766 The Story Of Us Puffy Message
ST-3048 BLT Pfy Msg
ST-4723 For Wedding Clear Layered
ST-1739 VIB Bubbles & Bling Stickers
PA-2386 LPA Pyramid Pad
PK-2147 BLT 12x12 SB Pad

Next stop on the hop is the talented Carrie Walz.

Thanks for hopping along with us at Momenta! I hope you are enjoying yourself!
Happy Scrappin'!!!
Pin It!

Welcome to the Berry Bleu Pages and Tags "Meet the Design Team" Blog Hop

Hey Everyone! Happy Saturday! I hope you all are having a fabulous weekend! I'd like to invite you to join us for our first blog hop at 'Berry Bleu Pages & Tags!'
 
How to play:
Our design team and October guest designers will be revealing their first projects for Berry Bleu. You will need to visit each blog and leave a comment that you have been there. Your last stop will be the Berry71Bleu blogspot. To qualify for the prize you will need to leave a comment on that blog letting us know you have visited all the designers. A winner will be randomly selected. You have from October 1- October 4 (12:00 a.m. eastern time) to complete the hop. A winner will be selected on October 4th!!!
 
Here is the PRIZE!

  If you have come to my blog first and would like to start at the beginning of the hop, below is the blog hop list:
 
1. (Lisa Novogrodski) lisas-livingincolor.blogspot.com
2 ( Iris Babao Uy) .www.irisbabaouy.typepad.com
3. (Jing Van Opstal) www.jingvanopstal.com/blog/
4. (Aymee Gandy) www.southernbellescrapper.blogspot.com (YOU ARE HERE)
5. ( Michelle Hodges) www.iluvscrapping.blogspot.com
7. (Cathy Cafun) cathycafun.blogspot.com
8. (Gerry Van Gent) gerryscrafts.blogspot.com
10.( Berry Bleu) berry71blue.blogspot.com
 
Now, I'd like to share with you my project I made for the hop. I have created an altered sign to hang in our home for the Halloween holiday. I started with a few sheets of 8 1/2 x 11" chipboard. I glued 3 sheets of the chipboard together to give me a good sturdy base. I then layered on some patterned papers, ribbon trim, and embellishments from Berry Bleu. I finished off the sign with some faux fur trim that I purchased at Hobby Lobby. It reminded me of the black crow's you see flying about during this time of year. I thought it would give the sign that extra spooky touch.
 Now, check out the tag from Berry Bleu! Isn't it gorgeous?!! Marivic has such amazing talent for creating these beautiful works of art! I am always amazed at her creations! This Halloween tag really brought my project to life!
 See all the neat detail she brings to the tags with embellishments? Love it!
 Here are 2 flowers that I added. They are made of felt.
 The 'Creepy' phrase is a sticker. I placed it on a shape that I cut using my Cricut and Home Decor' cartridge. I then added some rhinestones.
I hope you have enjoyed this project! Thanks for visiting my blog and Happy Halloween!

Next on the hop, you will be visiting the talented Michele. You can visit her blog by clicking HERE.
Happy Hoppin'!!!
Pin It!