A Scraphappy Southernbelle

Friday, August 19, 2011

It's A Card Making Kind Of Day

Hey  y'all! How are you doing on this beautiful summer day?!! I hope you are doing great and enjoying yourselves! I have created 3 simple little cards using Momenta products and these are also for my 'Operation Write Home' challenge. So doing a little double duty with these, which is great! It's always great to combine and knock two things out at once, right?! :)

This first card is for the 'Day 14' challenge, which required you to make a 'thinking of you' card using butterflies. I did not have any butterfly themed paper, so I pulled out a piece of subtle patterned paper and rub-on's from Momenta to make my own!

"Thinking of You"

Supplies Used
Cardstock, Patterned Paper, Rub-On's, Stickers (Border & Alpha), Bling: Momenta
Ribbon: Ribbon FX (Hobby Lobby)
Pre-Printed Card Base: The Paper Studio
 View of dimension on the card....
 Inside of card...
 This next card was for Day 27 of the challenge, which required you to use a frog on the card. I knew the cute little frog found on the flair stickers from Momenta would be perfect for the challenge!

"Hi"

Supplies Used
Patterned Paper, Stickers (Alpha, Border, & Flair): Momenta
Cardstock, Pre-Printed Card Base: The Paper Studio
Trim: Source Unknown (picked this up at Surplus City)
 View of dimension on the card...
 Inside of card...
 For this last card, also a 'Operation Write Home' card, the challenge was to make a beach themed card. When I think of the beach, I think of gazing at the clouds and beautiful skyline. I just love how it makes the water sparkle. So I went to this really neat foil patterned paper from Momenta. The paper has suns and clouds on it. Being foil paper, it really shimmers too...perfect for the challenge. Although it was not that easy to photograph, I still enjoyed using it!

"Hello Sunshine"

Supplies Used
Foil Patterned Paper, Cardstock, Stickers (Alpha, Phrase), Bubbles: Momenta
Pre-Printed Card Base: The Paper Studio
Twine: Divine Twine
 View of the dimension on the card...
(can you see how the foil paper reflects and shimmers?)
 Inside of card...
Thanks for visiting my blog! I hope you have enjoyed these cards! Have a great day!

Happy Scrappin'!!!
Pin It!

Thursday, August 18, 2011

A Witches 'Brew'

Hey guys! Happy Thursday! How is your week going so far? I hope you are having a grand week! I have been busy at my desk all week but unable to share the projects I made just yet as they are for future DT work. But I promise, they will debut soon! But, I did take a minute today to sit down and create a little card I've had tossing around in my head for a bit. I was first inspired to make this card by some ADORABLE clip art I purchased from My Grafico called 'Creepy Cocktails.' This set was created by JW Illustrations and you can see that by clicking HERE. Be sure you check it out as it is just too cute to miss!

I just loved this set the minute I saw it. I only wish they would have it available in SVG format so I could cut it with my Cricut instead of printing it on my computer. But I went ahead and purchased it anyway and as soon as I pick up some fresh ink for my printer I plan on making some cards using this adorable clip art. However, in the meantime, I just could not wait that long and had to figure out how to make a similar version using my Cricut Gypsy. My version is no where near as cute as the ones by JW Illustrations, but I had a lot of fun making this card.

"Witches Brew" Card

Supplies Used
Cardstock: The Paper Studio, Core'dinations, The Paper Company
Patterned Paper: Die Cuts With A View
Rhinestones: Queen & Co
Ink: Versamark (Tsukineko)
Electronic Cutter: Cricut Expression (Provo Craft)
Cartridges: Christmas Cards, Simply Charmed, Mini Monsters, Forever Young
Software: Cricut Gyspy (Provo Craft)
Adhesive: Helmar

For my card, I used the 'Simply Charmed' cartridge for my glass. For the witches legs, I used the heeled boot from 'Forever Young' and turned them upside down. I cut out the base part of the boot twice, once in green and once in purple. I then cut the purple into strips to create the striped sock look. The witches legs are meant to look like they are sticking up out of the bubbly 'brew.' The witches hat is from 'Mini Monsters' and the card base is from 'Christmas Cards.'
I used Zap Dots to pop up some of the pieces for added dimension.
I think I'll head on over to the "She's A Sassy Lady" blog and enter this in the current 'Gypsy Made Simple' challenge. I hope you have enjoyed this card. Very simple and very quick if you would like to re-create!

Thanks for visiting my blog! Happy Scrappin'!
Pin It!

Wednesday, August 17, 2011

Don't Forget....

Hey guys! I hope you are having a fabulous day! I just wanted to remind you of the Momenta 'Design Your Own Sticker' contest!!! Be sure to get those entries in! The prizes are AWESOME!!! We'd love to see what you can do!!! All the info you need is HERE.  Good luck!!!

Have a great day! Happy Scrappin'!

Pin It!

Monday, August 15, 2011

My Craft Spot Challenge #21-Gift Bags/Boxes

Hey guys! Happy Monday! How was your weekend? Did you do anything fun?!!! I myself did not do too much. After a 2 weeks of vacation and being on the go, I did a lot of resting. It was well needed too! I was just about worn out. I kept telling people that I was going to need a vacation to get over my vacation! LOL!

Today is my favorite day of the week because it's Monday and that means that there is a new challenge at My Craft Spot!!! Yay!!! As you may remember, I announced last week that I am the newest DT Member at MCS and am so excited to get started! For the challenge this week we are creating Gift Bags or Gift Boxes! If you would like to check out my fellow DT's amazing creations and play along yourself, go HERE. We'd love for you to come on over and play along with us! And be sure to link up your creation for a chance to WIN!!! Woot Woot!

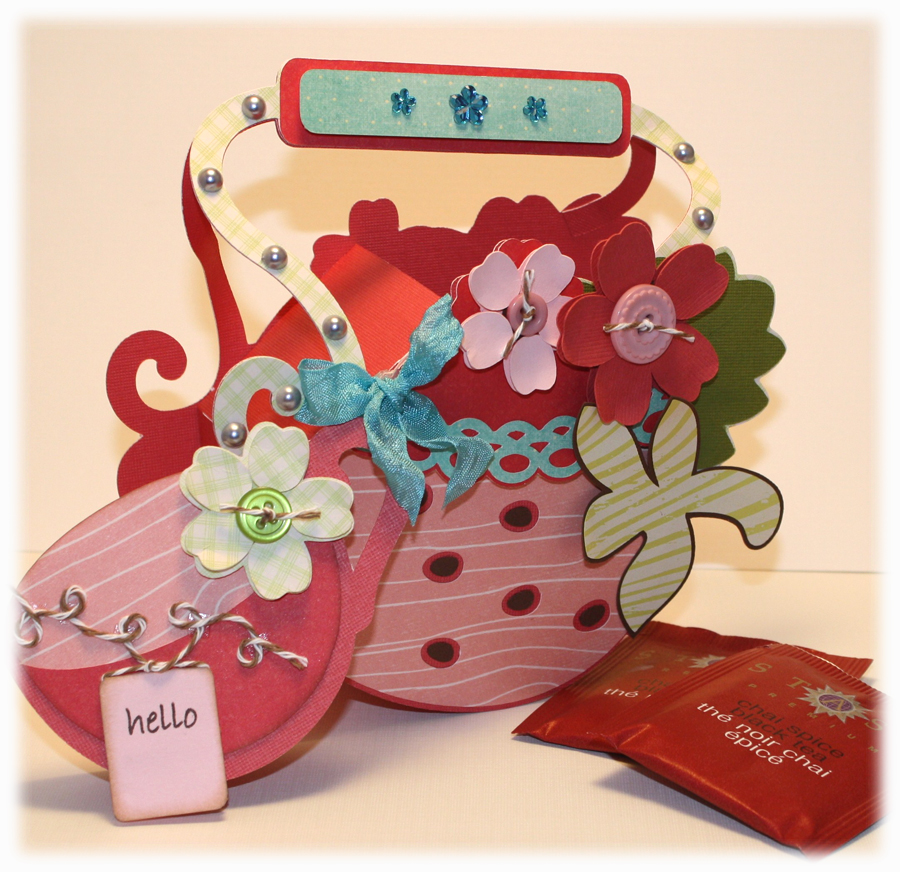
For my project, I have created a 'Strawberry Shaped Tea Kettle' Gift Box. This gift box was cut with files from SVGCuts.com. The gift box has a tea cup shaped card attached to it. I also used some awesome twine, crinkle ribbon, and stamps from My Craft Spot. The crinkle ribbon is a blue color called Caribbean and the stamps are from the 'Sweet Sentiments #1' set.

"Strawberry Tea Kettle" Gift Box

Supplies Used
Cardstock: Die Cuts With A View, The Paper Studio, Bazzill Basics Paper
Patterned Paper: Die Cuts With A View, Crate Paper
Rhinestones: Kaisercraft
Pearls: Queen & Co
Buttons: The Paper Studio, Jenni Bowlin Studio
Cricnkle Ribbon, Twine, Stamps: My Craft Spot
Electronic Cutter: Cricut Expression (Provo Craft)
Software: Sure Cuts A Lot (Craft Edge)
SVG Set: SVGCuts.com (Lunch With Mom)
Adhesive: Helmar

Here is my project:
 Here is an up close of the little tea cup shaped card that is attached to the tea kettle. I stamped the sentiment 'hello' onto the little piece of paper that would be attached to the tea bag. I also used a bit of twine for my tea bag string(s).
 I stamped another phrase from the MCS 'Sweet Sentiments' stamp set on the inside of the card. Here it is opened up...
 Here is a view from the top of the tea kettle shaped gift box so you can see down inside. The handles are glued together so that the gift box may be picked up.
 I love these flower svg's that come with the set from SVGCuts.com. They are so easy to put together and really add wonderful dimension! If you are interested in this SVG set, HERE is the direct link for you.
 This gift box holds 10 Chai tea bags. Yum! I love Chai tea!!!
I hope you have enjoyed this project! It really was so easy to put together. It took me about 3 hours to complete the whole project, but I am a slower scrapper. But I just love and highly recommend the SVG Files from SVGCuts.com. They make crafting so much fun!!!

AND please do hop on over to My Craft Spot and join us for this weeks challenge!
Happy Scrappin'!!!
Pin It!

Saturday, August 13, 2011

Come One, Come All! Step Right Up & See The Amazing Circus Classroom!!!

Hey y'all! Happy Saturday!!! I have a very special blog post for you guys today! As many of you may already know, my BFF and #1 Mom, is a 5th grade teacher at Russellville Elementary in Alabama. Each year Mom picks a theme for her classroom and we work on her room together. I flew down this year and helped her set everything up. We had such a good time! We always laugh a lot and have such a sense of accomplishment when we work on her new classroom. This year she decided to go with a circus theme and although I may be biased, it is just about one of the CUTEST classrooms we've ever done! I just loved all the bold, bright primary colors! It's so fun and I know the kids are gonna love it! A great space for them to expand their little minds in! So today, I wanted to give you a sneak peek into her classroom. So sit back, relax, and get ready for the ride....

First up, I wanted to start the tour from the outside of her classroom. As you walk into each classroom, there is a big bulletin board on the outside. This will be the first thing that many see as they enter her room so we always like to start out with a bang! Below is a picture of the bulletin board and my Mom (ain't she cute?!!) standing in front of it. The bulletin board is supposed to reflect a circus tent and the view of the inside as you peer in...
 For the circus tent top, side panels we used basic plastic tablecloths that you can purchase at any party supply store. We got ours at Hobby Lobby. We cut the red and yellow tablecloths into long strips for the tent top and sewed them together. We then bunched up one end and secured with a rubber band. To cover the rubber band, we cut a little flag and put the letters 'RES' (for Russellville Elementary School) on it. Then we used adhesive to spread the other end out. Mom then free hand cut the scallops into the tent top. Next, we took red pieces of tablecloth and pleated them for the tent sides. For the 'inside' of the tent, we used dark blue fabric for the background and bright yellow bordette. The lion in the center is a purchased item from Carson Dellosa. We cut the title 'Step Right Up' using the Cricut and Carousel cartridge. We cut the balloons out using the Cricut, SCAL software, and SVG files from SVGCuts.com. On each balloon is the individual names of the students in her classroom. She printed these out onto clear labels and affixed them to the balloons.
(you'll have to excuse the angle. The hallways are only so wide and it is impossible to stand directly in front of the board and snap a pic.)
 I created this sign that hangs down from the ceiling as you enter the door. I used the Circut Carousel Cartridge for the tent and the seal. The alpha's were cut with my Cricut and SCAL software. Patterned Paper by Sassafras. I also added some bling.
 Here is the door as you enter her classroom. I made the 'Welcome' Banner that is above the door. We cut her name 'Mrs. Fretwell' out using the Cricut Carousel cartridge. The individual tickets were purchased at a school supply store and also include the students names on each.
 Here is the view as you enter the classroom. The popcorn boxes and pieces of popcorn that hang from the ceiling were purchased at a school supply store. The students names are also on the popcorn boxes. The curtains on the windows were created by my Mom. We purchased this multi colored polka dot fabric at Joann and she used her sewing machine to stitch them.
 Here is the view of the classroom from the opposite side of the room. On the far wall, above the lockers, is an educational bulletin board. She will focus on Science things on this wall. By the TV is the wall for Social Studies posters. There is a different circus image on each of the individual lockers. These were all cut from the Cricut Carousel Cartridge and the Circus Collection from SVGCuts.com. Each kid has their name on the image by their particular locker.
 Here is my Mom's desk. She has a black bookshelf in front of her desk with bins that she created herself. I'm not sure what will go into these bins, but I know she has a plan for them. On top of the bookshelf is her name plaque that we bought her when she graduated college. Also, 2 pieces of scrappy art I created for her. I shared each of these on my blog a few weeks ago.
 Here is a closer view of the Science bulletin board. The colored sheets of paper will be places for the students classroom work to go to highlight what they are learning.
 Girls/Boys passes hanging on the wall by the door. I created these for her as well.
 This 'popcorn' themed bulletin board is at the front of the room by the white/Smart board that she uses to teach. We bought the bordette and images on the board at a school supply store. The red striped background is fabric we purchased at Joann. The yellow pieces of paper are where the students work can be displayed to show what they are learning at any point during the year. This will be where she posts their Math work. I just LOVE this board! It's so cute! The bookshelves below this board are for books the students can read.

 Closer view of the lockers...
 This board is on the back wall of the classroom. We did a double layer of bordette. The background is yellow fabric. All artwork, except the balloons and numbers on the calendar, were purchased at the school supply store. She will post the kids birthdays here and the balloons that the zebra is holding will be helper rotation.
 Here are their desks. The popcorn boxes to the left were purchased at Hobby Lobby. She put a red pen, a pencil, and crayons down inside the box. Then on the left is another popcorn box where their names will be placed to identify the desks.
I hope you will enjoy this peek into her classroom! It was so much fun to create and I hope the kids will enjoy learning in this space for the school year.

I'm off to scrap! Lots of work to be done! Have a wonderful weekend!!!

Happy Scrappin'!
Pin It!

Friday, August 12, 2011

You're Invited! Come & Join The FUN!!!

Hey guys! Check this out!!!

We are having a Stamp Release Party at My Craft Spot! I hope you will come by and join us! There is going to be so much fabulous scrappy inspiration! You won't want to miss it!!! Click on the picture below for all the details!!!!
AND while you're there, be sure to grab the button for extra chances to WIN!! Woot Woot!!!

Have a wonderful weekend everyone! Happy Scrappin'!!!
Pin It!

Exciting News!!!

Hey guys! Happy Friday! How are we all doing? Any fun plans for the weekend?!!! I hope you have lots of good stuff planned. As you may already know, I have been on vacation in D.C. with my in-laws all week, so this weekend I am staying in and just vegging out for 2 days! LOL! I may just stay in jammies! Who knows?!

Anyways, I wanted to hop online and blog right quick to share some exciting news!!! I am the newest Design Team member at one of my FAVORITE blogs....MY CRAFT SPOT!!!! I am so excited to get started! My Craft Spot is a wonderful place for scrappy inspiration and so much more!!! Check out the fabulous blog HERE.


And while you are there, check out the weekly challenges! I'd love to see you enter and to view your beautiful projects!!!

Have a beautiful weekend!!! Happy Scrappin'!!!
Pin It!

Thursday, August 11, 2011

Happy Birthday Card

Hey guys! How are ya?! I hope you are having a wonderful week. I am wrapping up my vacation with my family, but I have a quick card I wanted to share with you today. This card is for my DT blog post on the Momenta blog, but I wanted to share it here as well. I did a little tutorial on making this card and the ribbon technique I used. If you'd like to view that on the Momenta blog, go HERE. This card is for a very special friend of mine on her birthday. I hope she'll like it!

"Happy Birthday"

Supplies Used
Cardstock: Momenta, The Paper Studio
Patterned Paper, Stickers: Momenta
Rhinestones: Queen & Co.
Ribbon: Hobby Lobby
Ball Fringe: JoAnn
Border Punch: Martha Stewart Crafts
Corner Punch: EK Success
Adhesive: Helmar

Here is my card...

 Aren't these stickers cute? I love the shimmery effect they give!
 Card folded flat...
 I added solid cardstock to the back to add my sentiment/journaling...
Ok, back to vacation! I think my in laws are leaving Friday or Saturday. We are gonna miss them so much! But I will be back to normal life and posting on a regular basis then! Can't wait! I miss scrappin'! I hope all of you have a fabulous weekend! Thanks for visiting my blog!

Happy Scrappin'!!!
Pin It!

Wednesday, August 10, 2011

Happy Anniversary To Me!!! And My Husband, of course! LOL

Hey guys! I am so excited to say that today is my 9th wedding anniversary!!! I cannot believe that 9 years ago today I married my best friend, the love of  my life, my prince...Brandon! These 9 years have flew by! I hope we are blessed with many more! I love married life and feel so blessed to call Brandon my husband! Happy Anniversary babe! I love ya!!!
AND I hope all of you have a great day! I am back at vacationing today! We are visiting more monuments in D.C. and some of the Smithsonian Museums! Fun fun!!!

Happy Scrappin' guys!
Pin It!

Monday, August 8, 2011

Practical Scrappers Blog Hop RAK WINNER

Hey guys! Happy Monday to you! I hope you had a fabulous weekend! I am still on vacation and busy, busy, busy....BUT I wanted to hop online right quick and post the winner of the Practical Scrappers Blog Hop RAK that I had on my blog from this weekend!!! Yay!

I put all the names into a list randomizer at random.org and the first name that was pulled was....


drum roll please....


TINA!!!!
CONGRATULATIONS TINA!!!!!! Please email me your snail mail addy at aymee810@yahoo.com and I will get your prize out to you asap!

Thank you to everyone who stopped by my blog during the blog hop and for leaving a comment! It made my weekend to read all of your nice comments! THANK YOU!!!!!

I'm back to more site seeing on my vacation! I'll be back near the end of the week!
Happy Scrappin'!
Pin It!

Friday, August 5, 2011

Welcome To The 'Practical Scrappers' Blog Hop!!!

Hey guys! Happy Friday! TGIF!!! Woot Woot! I don't know about you, but I am so thrilled that the weekend is here. I have so much planned and can't wait to get started! I'm currently on vacay and there is so much fun stuff to go and do. I have family visiting and we are planning a week of fun! AND to make it even better, the Practical Scrappers Blog Hop starts today! Since it is PS's 2nd birthday, we are sharing projects that relate to the number 2!  If you would like to hop along with us in the hop, below is the blog hop list for ya:

(Be sure to visit all the blogs if you can because there are some amazing talent to be shared AND PRIZES to be given!!! Yippeeee!!!)

Aymee (You Are Here)
Teresa (Go Here Next)

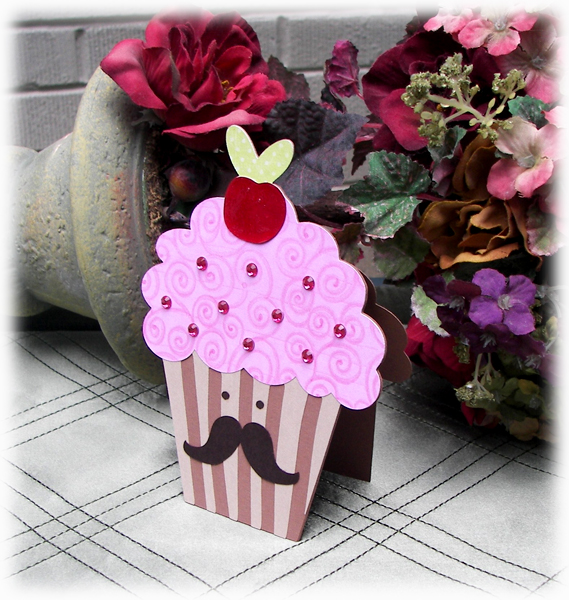
Now, I'd like to share with you my project that I created for the hop. Since it is PS's birthday and we are working with the number 2, I decided to create 2 birthday cards. For these cards, I used a new set of SVG files I purchased at Lettering Delights called 'Eat, Drink, and Be Hairy!' I just squealed with delight when I saw these and I knew I had to order a set! If you are interested in checking out this set, go HERE. I used my Sure Cuts A Lot Software and my Cricut Expression to cut these out. I welded the base shapes together to make these into shaped cards.

"Birthday Cards"

Supplies Used
Cardstock: The Paper Studio, Bazzill Basics Paper
Patterned Paper: The Paper Studio, Die Cuts With A View, My Mind's Eye
Rhinestones: Queen & co
Ribbon: Offray
Glossy Accents: Ranger Industries
Electronic Cutter: Cricut Expression (Provo Craft)
Software: Sure Cuts A Lot (Craft Edge)
SVG's: Lettering Delights
Adhesive: Helmar
 This is the first card I made. I added Glossy Accents to the cherry to give it a waxy texture like real cherries have.
 Inside
Here is the second card I made. My 6 year old nephew really enjoyed watching me make these. He and I both were giggling the whole time. I think I will leave each of these cards for him to have.
 Inside
I hope you have enjoyed these projects and that they brought a smile to your face. I really had fun creating them. I love to make things with SVG's that make me laugh! It's adds a little extra bit of fun to scrappin'!!

AND I just had to offer up a prize too! I will be giving away a prize pack STUFFED with all sorts of scrappy goodies to one randomly drawn participant of the blog hop who leaves me a comment here on this blog post! I will randomly draw a winner using the list randomizer at random.org after the hop is over and post the winner here. Good luck!!!

And enjoy the hop!

Thanks for visiting my blog! Happy Scrappin' and a happy weekend to all of you!
Pin It!

Wednesday, August 3, 2011

Those Faces

Hey guys! How are ya? I hope you are having a great week! I am still on vacay in Alabama, but I wanted to hop online and blog right quick. I have a new page for little Audrey's album to share with you today. This page features some of the adorable faces of Audrey. She is so cute!

"Those Faces"

Supplies Used
Cardstock, Patterned Paper, Brads: The Paper Studio
Alphabet Stickers: Doodlebug Design, Pink Paislee
Die Cut: source unknown (got this in a kit)
Hinges: Jenni Bowlin Studio
Rhinestones: Queen & Co
Thread: Coats & Clark
Ink: ColorBox (Clearsnap)
Corner Punch: EK Success
Adhesive: Helmar
Thanks for stopping by today! Enjoy your day!
Happy Scrappin'!
Pin It!

Tuesday, August 2, 2011

Dynamic Duo

Hey guys! How are ya? Are you enjoying this humid summer? I am enjoying plenty of scrappy time, but not the heat so much. LOL! I hope you are having a great day! I have another layout for the Kiel album to share with you guys today. This page features Audrey and her big sister enjoying some quality time.

 This page was a scrap lift and I wish I could remember where I found the inspiration for this page. I think I saw it on a online scrappy magazine a couple years ago. So if you recognize this page, please let me know so I can give you full credit for the lift!!! The original layout that I lifted was a boy themed page and I knew it would be cute for the girly girls too. I was feeling a creative slump when I created this page, hence the lift. I really appreciate all the inspiration posted by fellow scrappers online. It really helps when one is having a off day. :)

"Dynamic Duo"

Supplies Used
Cardstock, Patterned Paper: The Paper Studio
Alphabet Stickers: American Crafts
Die Cut: Elle's Studio
Pearls: Queen & Co
Trim: source unknown (picked this up at Surplus City)
Thread: Coats & Clark
Electronic Cutter, Cartridges: Cricut (Provo Craft), Gypsy Wanderings & Home Decor'
Software: Cricut Gypsy (Provo Craft), Sure Cuts A Lot (Craft Edge)
Adhesive: Helmar
Other: sewing machine

I used my Cricut and SCAL software to cut the button patterned paper into it's shape. I created the SVG for this shaped paper myself in Inkscape. If you'd like the shape, shoot me an email at aymee810@yahoo.com and I'll be happy to share. The die cut in the lower, right-hand corner is a place where Mrs. Kiel may journal her thoughts. I used my sewing machine and some white thread to add a decorative stitch to the edge of the green cardstock.
Have a great day!
Happy Scrappin to you!!!
Pin It!

Monday, August 1, 2011

Creating Two Cards Using Something Exactly The Same

Hey y'all! Happy Monday! Guess what? It is the 2nd anniversary of 'Practical Scrappers!' How exciting! And to celebrate, Practical Scrappers has a week long celebration planned. There will be awesome things on the blog all week. So be sure to follow along this week for lots of fun and inspiration! You can view the blog at:


Today, we are featuring 2 cards made by using something exactly the same. For example, one may use exactly the same paper, the same stamp, the same stickers, etc. on 2 cards. For my cards I used the exact same pink foiled cupcake liner on my cards.

"Love"

Supplies Used
Pre Printed Card Base: The Paper Studio
Patterned Paper: Die Cuts With A View, My Mind's Eye
Rhinestones: Queen & Co
Trim: source unknown (found at Surplus City)
Cupcake Liner: Wilton
Electronic Cutter, Cartridge: Cricut Expression (Provo Craft), Simply Charmed
Embossing Machine, Folder: Cuttlebug (Provo Craft), D'Vine Swirl
Adhesive: Helmar
 Love this foiled cupcake liner. It provides great dimension.
 "Hi"

Supplies Used
Pre Printed Card Base, Flower: The Paper Sudio
Patterned Paper: Die Cuts With A View, My Mind's Eye
Alphabet Stickers: Cloud 9
Trim: source unknown (found at Surplus City)
Cupcake Liner: Wilton
Embossing Machine, Folder: Cuttlebug (Provo Craft), Swiss Dots
Adhesive: Helmar
 AND....I had to show you a gift I received!!! Check out this adorable frame my Mom made me for my home! Isn't it the cutest?! It even has a little mini whisk on it. If you know me, you know I go crazy over anything that's mini sized! I had a fit over this!
I hope you enjoyed these projects! Thanks for stopping by my blog!
Have a wonderful day!
Happy Scrappin'!
Pin It!