A Scraphappy Southernbelle

Tuesday, October 4, 2011

2 New Halloween Cards

Hey y'all! Happy Tuesday! I am SOOOO Excited today because it's my BIRTHDAY!!! Woot Woot! I am 28 years old today! Eeek! Before you know it, it'll be the big 3-0! But it's all good! Just glad to be here! AND the best part of my birthday is that I'm not alone! IDK if any of you know this but I've spent about the last 4 birthdays alone. We had moved to PA and the hubby had to work all day on each of my previous birthdays for the past few years! It was kinda depressing, but he is home today! Yay! AND I'm hoping my present will be something that barks! LOL! I've got my eyes set on a Yorkie! We'll see! Stay tuned!

Anyways, on to the scrappyness! I have 2 new Halloween cards that I made last week for one of my favorite SVG stores...My Scrap Chick!!! I just adore their files! They are so fabulous! These new files are card fronts that coordinate with their holiday treat bags! How cool is that! So here is what I came up with...

"I Want Candy"

Supplies Used
Cardstock: The Paper Studio, Bazzill Basics Paper
Patterned Paper: Die Cuts With A View
Twine: My Craft Spot
Stickers: Momenta, Making Memories
Buttons: American Crafts, others from my scrappy stash
Corner Punch: EK Success
Electronic Cutter: Cricut Expression (Provo Craft)
Software: Sure Cuts A Lot (Craft Edge)
SVG's: My Scrap Chick
Adhesive: Helmar
 I added a few color coordinated buttons on top of my candy corn sections to add some dimension.
 Here is the inside of my card. The stickers that say 'I Want' are from Making Memories and the word 'Candy' is from Momenta. I also added a strip of leftover patterned paper to the inside for a pop of color.
 "Happy Halloween"

Supplies Used
Cardstock: The Paper Studio, Core'dinations
Patterned Paper: Die Cuts With A View
Stickers: Momenta, Making Memories
Twine: My Craft Spot
Thread: Coats & Clark
Trim: Hobby Lobby, Fancy Pants Designs
Electronic Cutter: Cricut Expression (Provo Craft)
Software: Sure Cuts A Lot (Craft Edge)
SVG's: My Scrap Chick
Adhesive: Helmar
Other: sewing machine

To make the candies, I cut out the candy centers and wrapped twine around in a circle. I then popped these up using pop dots for added dimension.
 For the inside of the card, I used a bit of the 'negative' cut I had left on my Cricut mat after I peeled off the card front.
I hope all of you have a fabulous day! Thanks for stopping by my blog! I hope to see you again soon!

Happy Scrappin'!!!
Pin It!

Saturday, October 1, 2011

Welcome To The 'Momenta World Card Making Day Blog Hop!!!'


***NOTE: If you are interested, check out the post BELOW this one for the Berry Bleu Pages & Tags Blog Hop! There is a PRIZE up for grabs as well!!!***


Hey y'all! Happy Saturday! I hope you all are having a fabulous weekend so far! Happy World Card Making Day to all of you crafters out there!

To celebrate World Card Making Day, Momenta is hosting a blog hop in hopes of inspiring your creativity with our fabulous products! If you are visiting my blog for the first time and would like to start at the beginning of the hop, go HERE to visit the Momenta blog and to get all the details of the hop. There are some fabulous Momenta prizes up for grabs! Woot Woot!!!

We hope that you have lots of fun and enjoy the wonderful creations from our Design Team!

For my project, I used the 'Formal Affair' Boxed Card Kit from Momenta. This card kit is so fabulous! It is stuffed full of scrappy goodies! The kit comes with 12 cards and envelopes, assorted cardstock stickers, borders, and gems!
First I decided to decorate the outside of my box to personalize it a bit. I just love the boxes that these card kits come in! They all have an attractive pattern on the outside and are very sturdy! So when the cards have all been sent out, I'll have this nifty little box to store things in my scrappy studio! Here is my altered card box:
 I cut patterned paper from Momenta for the medallion shape in the background. I then added some flourish stickers. For the center, I cut 2 scallop circles (both out of Momenta cardstock) and popped them up on pop dots. I added an 'A' for my initial, a floral clear layered sticker, and some bling stickers.
 Love the clear layered stickers from Momenta! They provide great dimension!
 After decorating my card box, I decorated each of the 12 cards that came in the box with coordinating supplies from Momenta. Here are my 12 cards...

"Together Forever"
 "Just A Note"
 "Birthday Gifts"
 "HB" (Happy Birthday)
 "Hello"
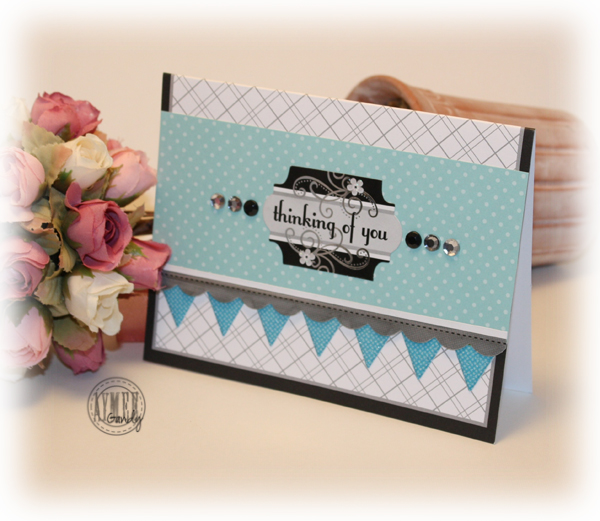
 "Thinking Of You"
 "Wedding"
 "Hi There"
 "If I Had A Flower..."
 "Miss You"
 "Hello"
 "Love"
Momenta Supplies Used :
NC-1363 FOR Card Kit
ST-2962 BLT Pfy Flourish
ST-4759 C&C Pfy Borders Boy
ST-2039 Turq Puffy Glitter Alpha
ST-1766 The Story Of Us Puffy Message
ST-3048 BLT Pfy Msg
ST-4723 For Wedding Clear Layered
ST-1739 VIB Bubbles & Bling Stickers
PA-2386 LPA Pyramid Pad
PK-2147 BLT 12x12 SB Pad

Next stop on the hop is the talented Carrie Walz.

Thanks for hopping along with us at Momenta! I hope you are enjoying yourself!
Happy Scrappin'!!!
Pin It!

Welcome to the Berry Bleu Pages and Tags "Meet the Design Team" Blog Hop

Hey Everyone! Happy Saturday! I hope you all are having a fabulous weekend! I'd like to invite you to join us for our first blog hop at 'Berry Bleu Pages & Tags!'
 
How to play:
Our design team and October guest designers will be revealing their first projects for Berry Bleu. You will need to visit each blog and leave a comment that you have been there. Your last stop will be the Berry71Bleu blogspot. To qualify for the prize you will need to leave a comment on that blog letting us know you have visited all the designers. A winner will be randomly selected. You have from October 1- October 4 (12:00 a.m. eastern time) to complete the hop. A winner will be selected on October 4th!!!
 
Here is the PRIZE!

  If you have come to my blog first and would like to start at the beginning of the hop, below is the blog hop list:
 
1. (Lisa Novogrodski) lisas-livingincolor.blogspot.com
2 ( Iris Babao Uy) .www.irisbabaouy.typepad.com
3. (Jing Van Opstal) www.jingvanopstal.com/blog/
4. (Aymee Gandy) www.southernbellescrapper.blogspot.com (YOU ARE HERE)
5. ( Michelle Hodges) www.iluvscrapping.blogspot.com
7. (Cathy Cafun) cathycafun.blogspot.com
8. (Gerry Van Gent) gerryscrafts.blogspot.com
10.( Berry Bleu) berry71blue.blogspot.com
 
Now, I'd like to share with you my project I made for the hop. I have created an altered sign to hang in our home for the Halloween holiday. I started with a few sheets of 8 1/2 x 11" chipboard. I glued 3 sheets of the chipboard together to give me a good sturdy base. I then layered on some patterned papers, ribbon trim, and embellishments from Berry Bleu. I finished off the sign with some faux fur trim that I purchased at Hobby Lobby. It reminded me of the black crow's you see flying about during this time of year. I thought it would give the sign that extra spooky touch.
 Now, check out the tag from Berry Bleu! Isn't it gorgeous?!! Marivic has such amazing talent for creating these beautiful works of art! I am always amazed at her creations! This Halloween tag really brought my project to life!
 See all the neat detail she brings to the tags with embellishments? Love it!
 Here are 2 flowers that I added. They are made of felt.
 The 'Creepy' phrase is a sticker. I placed it on a shape that I cut using my Cricut and Home Decor' cartridge. I then added some rhinestones.
I hope you have enjoyed this project! Thanks for visiting my blog and Happy Halloween!

Next on the hop, you will be visiting the talented Michele. You can visit her blog by clicking HERE.
Happy Hoppin'!!!
Pin It!

Friday, September 30, 2011

Yay! It's Friday!!!

Hey guys! Happy Friday! Check it out! My Craft Spot is having a Design Team Call!!! How Exciting! I LOVE MCS and I think you will too! If you are interested in the call go HERE or click on the picture below.
Also, I have a little something crafty to share with you today. As some of you may know, I really really REALLY have my sights set on a Yorkie! My birthday is coming up this week and I am hoping for a present that barks! LOL! Well, even though she is not here yet, I've already named her after my favorite move character....Katie Scarlett. Any 'Gone With The Wind' fans out there?! This is where her name inspiration came from. Well of course you know me, I will have to glam up and personalize her 'doggie condo.' So I have made a little hanging nameplate sign for her space. It is made out of a chipboard crown that I had in my scrappy stash and some goodies from Momenta!

"Our Beautiful Katie Scarlett"

Supplies Used:
Patterned Paper, Alphabet Stickers, Clear Layered Sticker, Border Stickers, Bling Stickers: Momenta
Ribbon, Lace: Hobby Lobby
Chipboard Crown: not sure where I got this
Decorative Edge Scissors: Fiskars
Adhesive: Helmar
 The mixture of alpha's and message stickers are all from Momenta and are puffy stickers.
 Isn't this butterfly clear layered sticker so fun?! Also, I pleated some patterned paper for the bottom of the crown. Once pleated, I cut the edges with some decorative scissors.
 Another clear layered sticker. For the points on the crown, I used some more puffy bling stickers from Momenta.
I hope you all have a fabulous weekend!!!!
Happy Scrappin'!!!
Pin It!

Thursday, September 29, 2011

Upcoming Blog Hop! Check It Out!

Hey y'all! Happy Thursday! I have been as busy as a bee today in my scrappy studio. I made 14 cards! I will be sharing next week so stay tuned! In the meantime though I wanted to let you guys know about an exciting blog hop!
(click on picture for details)
I'm so excited for next week! Not only will I play along with the Berry Bleu blog hop, but we area also having a blog hop at Momenta to celebrate World Card Making Day! AND my birthday is next week! So stay tuned next week! Lots of fun stuff going on!

Have a fabulous weekend! Hugs to you guys!
Happy Scrappin'!
Pin It!

Tuesday, September 27, 2011

I Only Have Eyes For 'Boo'

Hey guys! Happy Tuesday! I have another Halloween card to share with you today! I am really in a Halloween mood! I think it's one of my favorite times of the year to create!

"I Only Have Eyes For Boo"

Supplies Used
Cardstock: The Paper Studio, Core'dinations, Colorbok
Patterned Paper: Die Cuts With A View
Twine, Crinkle Ribbon: My Craft Spot
Button: Pink Paislee
Rhinestones: Queen & Co.
Thread: Coats & Clark
Glitter Glue: Stickles (Ranger Industries)
Electronic Cutting Machine: Cricut Expression (Provo Craft)
Software: Sure Cuts A Lot (Craft Edge)
SVG's: My Scrap Chick (Boo Bunch, Card Essentials 2)
Punch: EK Success
Font: Allison's Hand
Adhesive: Helmar
Other: sewing machine, printer

I started this card out by cutting the card base and the card pieces using my Cricut, SCAL, and files from My Scrap Chick. I love the 'Card Essentials 2' set from MSC! If you are ever unsure of how to put a card together or maybe just aren't feeling the scrappy mojo, this set is fabulous! It has pre-designed card bases ready to cut for you. So you can cut them out and then embellish as desired! On this card, I added a ghost, some stitching, and crinkle ribbon.
 For the inside of the card, I typed up my sentiment using the Allison's Hand font. Love that font!
 I popped up a few of the things on the card for added dimension.
That's all for me today! I hope you all have a fabulous day! Take care!
Happy Scrappin'!!!
Pin It!

Monday, September 26, 2011

Candy Corn Craze

Hey y'all! Happy Monday! I hope you all had a fabulous weekend! I have a new post going up over at the "She's A Sassy Lady" blog today and I thought I would share my projects with you guys here too!

Can you believe it is almost October?!! Time just keeps on flying by! I am sooo excited for October! Not only is it my birthday month (October 4) but it's also time for Halloween! I love Halloween! I spent the weekend decorating our home for the upcoming holiday and as I was decorating I started to crave some candy corn. I just love that stuff! It's sweet, colorful, and just perfect! So with visions of candy corn dancing in my head, I flew over to my scrappy desk to start creating. Here is what I came up with:

"Let's Paint The Town"

Supplies Used
Cardstock: The Paper Studio, Bazzill Basics Paper
Patterned Paper: Die Cuts With A View
Ribbon: Hobby Lobby
Rhinestones: Queen & Co.
Stamp: Studio G
Ink: Stampin' Up!
Colored Pencils: Crayola
Corner Punch: EK Success
Electronic Cutter: Cricut Expression
Cartridge: Slumber Party
Font: Allison's Hand
Adhesive: Helmar

I started out by cutting this card base from the 'Slumber Party' cartridge. I then cut 3 bottles of nail polish from the same cartridge and added 'candy corn' colored paint to the inside of each. I stamped the candy corn underneath that and colored those in with my colored pencils. I'm not much of a artist when it comes to coloring in stamped images, but I tried my best! I used pop dots to pop up the bottles of nail polish for added dimension. I also added some rhinestones to the bottles. I finished off the card with some black ribbon.
 Here is a closer view of my bottles. I wonder what people would think if I painted my toenails in these colors? Would they think I'm crazy?! Tee Hee! Probably so! But how festive would that be?!
 I used my Microsoft Word program on my computer to type up my sentiment for the inside of the card. I printed it out onto some white cardstock and added it to the inside with coordinating patterned paper.
"Candy Corn Cupcake"

Supplies Used
Cardstock: The Paper Studio, Bazzill Basics Paper
Twine: My Craft Spot
Rhinestones: Queen & Co.
Glitter Glue: Stickles (Ranger Industries)
Electronic Cutter: Cricut Expression
Cartridge: From My Kitchen
Software: Cricut Gypsy
Embossing Machine: Cuttlebug
Embossing Folders: Swiss Dots, D'Vine Swirl
Adhesive: Helmar

What Halloween would be complete without a candy corn colored cupcake? I used my Gypsy and the 'From My Kitchen' cartridge to make this shaped card. I added a bit of embossing for texture.
 I added Stickles to the cupcake liner and the cherry for some shine.
"Candy Corn Kisses, Halloween Wishes"

Supplies Used
Cardstock: The Paper Studio
Patterned Paper: Die Cuts With A View
Trim: source unknown (got these at a discount store called Surplus City)
Rhinestones: Queen & Co.
Thread: Coats & Clark
Stamp: My Craft Spot
Ink: Stampin' Up!
Electronic Cutter: Cricut Expression
Cartridge: Smiley Cards
Software: Cricut Gypsy
Adhesive: Helmar

For this card, I cut out a large piece of candy corn using the Smiley Cards cartridge on my Gypsy. I then layered a mixture of yellow, orange, and white trim over the top of it to create a unique piece of candy corn. I also did a bit of stitching with my sewing machine. This card was really simple and came together in about 20 minutes.
 I stamped the inside of the card with a stamp from Kimberly over at 'My Craft Spot.'
 I love the texture the trims give! I wish I could take all of you scrappers with me to this store called 'Surplus City' in my town! Y'all would have a fit! There is an aisle about 50 yards long STUFFED with trim, ribbon, lace, etc. It is like a scrappy heaven! LOL
 
I hope you have enjoyed these 'candy corn' themed projects and that they will inspire you to create some of your own! Have a safe Halloween!
Happy Scrappin'!!!
Pin It!

My Craft Spot Challenge #27-Ribbon

Hey y'all! Happy Monday! I hope you all had a wonderful weekend! Today we have a new challenge going up at My Craft Spot and it focuses on one of my absolute favorite scrappy supplies...ribbon!!! Who says diamonds are a girls best friend? I say RIBBON is my best friend! I could collect ribbon all day long! I just love the wide array of the different ribbons, trims, etc. out there for us crafters to create with! So why not pull out some of your favorite ribbon and join us for this fun challenge?!!! Be sure to link up your project over at the MCS blog and you'll be entered to WIN a fabulous prize! Woot Woot!!! I can't wait to see what everyone creates!

For my project this week, I created an altered frame to hang in my dining room/kitchen. I found this frame base at a local dollar store. I took out the picture inside and recycled the frame for my own scrappy needs. I used my Cricut and Sure Cuts A Lot Software to cut out the cute little boy/girl chef. This set is from My Scrap Chick and can be found HERE if you are interested in that. The set is called 'The Happy Couple.' Of course I had to pull out several ribbon tricks since the challenge is themed around ribbon. I had a lot of fun making this project and I hope it will look good hanging in our home.

"Have A Happy Day"

Supplies Used
Cardstock: The Paper Studio, Die Cuts With A View
Patterned Paper: Die Cuts With A View, My Mind's Eye
Crinkle Ribbon, Twine, Stamp: My Craft Spot
Pink, Blue, Teal Ribbon: Ribbon FX (Hobby Lobby)
Thread: Coats & Clark
Rhinestones/Pearls: Queen & Co
Electronic Cutting Machine: Cricut Expression (Provo Craft)
Software: Sure Cut's A Lot
SVG's: My Scrap Chick (The Happy Couple, Card Essentials 2)
Embossing Machine: Cuttlebug (Provo Craft)
Embossing Folder: Swiss Dots
Ink, Pen: Stampin' Up!
Adhesive: Helmar

Here is my frame:
(you'll have to excuse the pic. It's not the best, but it was raining when I took it and had to take it inside.)
 Here is the view of a ribbon technique I used. I layered some blue ribbon and cream colored crinkled ribbon on a strip of cardstock for my border and put a stitch over it. Then I flipped it over and adhere strips of teal colored ribbon that I had tied a knot in. I then used my scissors to trim the ribbon at the edges in varying lengths. Super simple and a great way to provide some dimension!
 Here's the happy couple! I love this set from My Scrap Chick! Super Cute! I used twine around the edge from My Craft Spot to highlight them a bit better.
I hope you have enjoyed this project and that you will hop on over to My Craft Spot to join in on the ribbon fun! See you there!

Have a fabulous day! Happy Scrappin'!!!
Pin It!

Friday, September 23, 2011

Check It Out!

Hey guys! Check this out! Practical Scrappers is having their BIGGEST contest EVER!!!!

Go HERE

Have a fabulous weekend! Happy Scrappin'!!!
Pin It!

Thursday, September 15, 2011

Authentique Giveaway

Hey guys! Check out this giveaway at Practical Scrappers!!!
Go HERE!!!!

Happy Scrappin'!!!
Pin It!

Wednesday, September 14, 2011

Taking A Bit Of A Break...

Hey guys! How are ya?! I feel like I haven't blogged in forever! I know I haven't been posting, but I still wanted to hop online and shout out a hello! I have been taking a little scrappy break. I just need a little time for myself and to work out some things. I hope to be back soon, so please bear with me if you can. I miss the scrappy world and I hope I can return to my normal self again soon!

Have a great day! Take care of yourselves!
Happy Scrappin'!!!
Pin It!

Monday, September 12, 2011

My Craft Spot Challenge #25-Happy Harvest

Hey guys! Happy Monday! I hope you all had a wonderful weekend! We have a new challenge for you today at My Craft Spot! This weeks challenge is 'Happy Harvest.' We are creating festive projects for the upcoming season! I just adore this time of year. For me, the weather is so perfect and the symphony of colors are just so calming. I love it!

For my project, I created a Thanksgiving card using a stamp and crinkle ribbon from 'My Craft Spot.' I also brought in some festive patterned paper and green fabric.

"Happy Thanksgiving"

Supplies Used
Cardstock, Card Base: The Paper Studio
Patterned Paper: Die Cuts With A View
Stamp, Crinkle Ribbon: My Craft Spot
Ink: Stampin' Up!
Rhinestones: Queen & Co.
Fabric: Jo Ann
Staples: Swingline
Corner Punch: EK Success
Decorative Edge Scissors: Fiskars
Electronic Cutter: Cricut (Provo Craft)
Cartridge: Home Accents
Adhesive: Helmar
 To show some of the dimension...
If you can, do hop on over to My Craft Spot and join us for this challenge! We'd love to see what you can do! Happy Scrappin'!!!
Pin It!