A Scraphappy Southernbelle

Wednesday, July 6, 2011

Card Creatin'

Hey y'all! Happy Hump Day! Can you believe it's already Wednesday?!! Man, where is this week going? Before we know it, it'll be August at this rate! LOL! Or at least it will for me. But anyways, I hope you all are enjoying your summer so far! Although summer is not my favorite season, I do enjoy it because it gives me plenty of time to stay inside and work at my scrappy desk. I do not like the heat very much and prefer to be a home body during the summer. So that is what I did yesterday...cleaned house, made dinner, and then scrapped! So fun!

Today I have 2 cards to share with you. This first card is doing some double duty. I am using it for 2 challenges:

1. This week's Gypsy Made Simple Challenge at "She's A Sassylady" called for you to make a card with words. Although I took this in a little bit of a different direction than the tutorial, I did use words on it. You can check out the challenge HERE if you are interested. I love this blog!!

2. This week's challenge at 'My Craft Spot.' This is a new blog to me and I love it! There is so much inspiration over there! This week's challenge is to make a summer themed project. You can check out the challenge HERE. For my project, I created a card that, to me anyway, exudes summer. These are the cool colors I think of when I think of summer. I used my Cricut, Gypsy, and Cricut cartridges to create the summer images on the front.

"Sunny Days"

Supplies Used
Cardstock: Bazzill Basics Paper, The Paper Studio
Patterned Paper: Die Cuts With A View
Rhinestones: Queen & Co
Glitter Glue: Stickles (Ranger Industries)
Corner Punch: EK Success
Electronic Cutter: Cricut (Provo Craft)
Cartridges: Gypsy Wanderings, Celebrate With Flourish
Software: Cricut Gypsy (Provo Craft)

I used my Gypsy to weld the images on the front of the card to one another and to the card base. And I have to say that I ADORE this paper from DCWV!!! The patterns, the colors, everything about it....YUM!
 I added glitter glue to the center of the sun and to some of the letters for an added sparkle, which reminds me of the sun sparkling off of the water on a warm summer day.
 I used Zap Dots to pop up the 'sunny day's title for some added dimension.
 Here is the back of the card. The white space is where I can write my sentiment and I added my custom stamp.
 Next up, I created this quick and simple card for Day 10 of the 'Operation Write Home' Challenge I am participating in. For this challenge, you are supposed to create a baby boy card and not use the phrase "it's a boy." So I decided to dig into my sticker bin to see what I could come up with. I purchased these stickers at The Dollar Tree years ago when I first started scrapbooking. I'm glad I could finally use them.

"Welcome To The World Little One"

Supplies Used
Card Base, Cardstock: The Paper Studio
Patterned Paper: Die Cuts With A View
Clear Sticker, Felt Sticker, Chipboard: Mrs. Elizabeth
Pearls: Queen & Co
Corner Punch: EK Success
 Such a cute little bear! The bow came on the sticker. I added the chipboard to the center.
 I added another sticker to the inside.
I hope you have enjoyed these cards! Have a fabulous day!!!
Happy Scrappin' to ya!!!
Pin It!

Tuesday, July 5, 2011

Welcome To The SFTIO Blog Hop!

Hey y'all! How are ya doing today?! Did you enjoy a good 4th of July holiday? I hope so! It was pretty quiet around here. My husband and I just chilled out around the house. But it was a fun day!

Today, I'd like to invite you to hop along with me in the 'Scrapbooking From The Inside Out' Blog Hop! As you may remember, I served on the SFTIO Design Team a while back. I just adore their kits! SFTIO is all about scrapbooking your inner thoughts and feelings...a great form of scrappy therapy! If you are just joining in on this hop and would like to start at the beginning, go HERE to see Melissa's Blog. She is first up on the hop. Be sure to hop along and visit each blog. There is also prizes to be given out at the end of the hop!!!And by prizes, we're talking your choice of kits!!! Yippee! So be sure to leave comments as you go along!
 Now, for this hop, we were asked to choose a favorite layout from our time as a DT Member of SFTIO. This was hard for me to do. I always enjoyed each of their kits and creating with them during my term. The embellishments/papers in each kit were just so fabulous! But in the end, I chose this layout. For this page, I used some artwork provided on the forum by Nancy. This layout is about how life is hard and that it gets so frustrating hearing bad news after another. But in the end, I know I have the love of my life by my side, we'll get through it, and the hope that tomorrow will be a better day. And I have to say, that after I did this page, I felt so much better. I did this about a year ago I guess and life definitely has gotten better. Scrapbooking and SFTIO really helped me through those down times! Here is my page:
Now, next on the hop is Mette! You can visit her blog HERE. Happy Hoppin' Everyone!

Thanks for visiting my blog! Have a fabulous day!
Happy Scrappin'!!!
Pin It!

Sunday, July 3, 2011

You Make My Life Beautiful

Hey guys! How are you doing on this gorgeous day? I hope you are having a good one so far! I am so excited today because my very first Momenta project debuts today!!! Yay! I am just so excited to have the opportunity to work with these adorable products! As a matter of fact, they were all so adorable, I couldn't pick just one collection to work with. So I made this layout featuring papers and embellishments from 3 different Momenta collections! I just had so much fun!! This page features two of my favorite people, my sister in law and my nephew. They both are very special people in my life and I love them both very much!

"You Make My Life Beautiful"

Supplies Used
Cardstock: Momenta, The Paper Studio
Patterned Paper, Stickers, Embellishments: Momenta
Thread: Coats & Clark
Border Punch: Martha Stewart Crafts
Electronic Cutter, Cartridge: Cricut (Provo Craft), Plantin' Schoolbook
Other: sewing machine

I began with a textured cardstock base from the 'One Fine Day' Super Paper Pad and then layered patterned papers on top of that. I then added a bit of stitching and the gorgeous embellishments from Momenta pulled the page all together.
 This flourish sticker is from the 'Kaleidoscope' Puffy Flourish Sticker Collection. I just love the bit of dimension these puffy stickers give and they feel so good! I kept rubbing my fingers over them and going 'Ohhhh, It's so soft!' I bet my husband wondered just what I was doing!
 My title consists of square alphabet stickers pulled from the 'Kaleidoscope' 12x12 Super Paper Pad and a 'Beautiful' puffy title sticker. I really like that the Super Paper Pad comes with alphabets. And what a steal price-wise on the 'Beautiful' puffy title sticker! I think it was like $2.99.
 These clear layered stickers are also so fun to add a bit of dimension and whimsy to any project. I added two here...
 and another here. Aren't those stickers so cute?!!!
 I also wanted to mention the flair embellishments. This one is from the 'One Fine Day' Flair Pack. These are much larger than I anticipated from looking at the online catalog at Momenta.com and are perfect for adding even more dimension!
Thanks for visiting my blog!!! I hope you have enjoyed today's post!

Happy Scrappin'!
Pin It!

Friday, July 1, 2011

Lots of New Scrappy Projects!!!

Hey y'all! Happy Friday and Happy July!!! Can you believe it is July?! I am so excited today though because it's my big brother's birthday!!! So a BIG shout out to my bro, Tyler, on his special day! I hope he has a fabulous birthday!!! I only wish I could be there to celebrate with him, but as always, he is in my thoughts. Have a wonderful day, Tyler! I love you!!!

Now, on to the scrappyness! I have been working all week on several projects and I just decided to share them all at once today. So here we go...

"Halloween Mask"

Supplies Used
Cardstock: The Paper Studio, Core'dinations
Patterned Paper: The Paper Studio (Green Swirls, Halloween Mix)
Ribbon: Decorative Trim (Hobby Lobby), Ribbon FX (Hobby Lobby)
Rhinestones: Studio 18
Electronic Cutter: Cricut (Provo Craft)
Electronic Cutter Software: Sure Cuts A Lot (Craft Edge)
SVG: SVG Cuts (this was a FREEBIE, find it HERE)
Wooden Dowel: Hobby Lobby
Other: glue gun, glue sticks

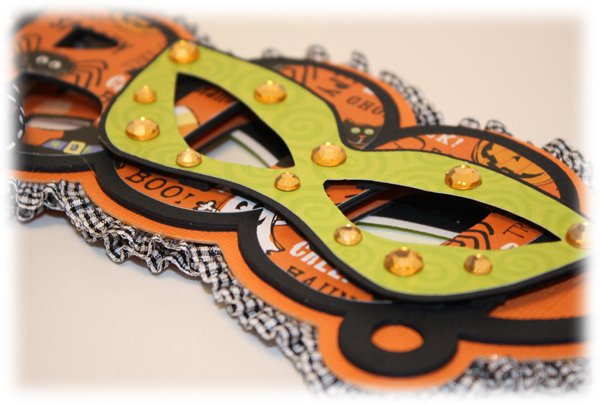
I had SO MUCH FUN on this project! If you are a follower of my blog, you may remember I made one similar to this last year. Find it HERE if you are interested in seeing it. However, last year, I pretty much made it as a decoration piece to display in my home during the Halloween holiday and not for actual use. I put squiggly eyes on it last year and I had many ask me 'well, how can you see through the mask?' LOL. So I thought, well I am going to tinker with the freebie from SVG Cuts and see if I can make it into a mask that one can hold up and look through. So after much tinkering, I figured it out and am so happy with this project. It is very sturdy and ready to be used with any cutesy Halloween costume.

I had to stand it up with the help of a decoration piece from my kitchen. I wanted to hold it up to my face and have someone snap a pic so you could see what it looks like in front of a face, but I was home alone and could not. But I think you can tell about it from this pic.
 I cut my dowel down to 10 inches and wrapped ribbon around it to hide the wood. I also added a array of ribbons to the handle. I really waned to girly this up, y'all know me....LOL.
I have lots of dimension going on in this project. I popped the green mask part up using Zap Dots. To make the mask sturdy, I cut out the shadow of the word 'Boo' about 10 times and glued them on top of one another. This helped to provide a good base for my project. Here you can see all of that dimension...
(Also, I finished out the back of the mask exactly like the front. I wanted it to look nice on each side. But I forgot to snap a pic of the back. The black/white frilly trim on poking out on the edges of the front and back piece help to hide the wooden dowel.)
 I just loved all this ribbon. I really like the black/orange/white combo. I got a sweet deal on all this ribbon at Hobby Lobby last week. They were having a HUGE 'The Paper Studio' (which is their brand of product) sale at the store. I got all these ribbons on spools for a buck a piece! I got like 12 spools of ribbon for $12!!! I was doing the happy dance all the way home....still am! LOL
 "Holly Leaves" Christmas Card

Supplies Used
Pre-Cut Card Base: The Paper Studio
Cardstock: The Paper Studio, Sassafras
Patterned Paper: The Paper Studio
Decorative Scissors: Fiskars
Chipboard Stickers: American Crafts
Button: The Paper Studio
Die Cut: Jenni Bowlin Studio
Trim: Hobby Lobby
Pen: ZIG Memory System (Kuretake)

This is just a simple little Christmas card.
 Up close view of die cut/button/stickers...
 I did a bit if paper pleating with the brown cardstock. And check out this CUTE trim! Another Hobby Lobby Find! I attached this trim with 450 Quick Dry. I also applied a bit of Fray Stoppa to the ends of the trim to keep it from fraying.
 "Thanksgiving Banner"

Supplies Used
Cardstock: The Paper Studio
Patterned Paper: Bella Blvd., Sassafras, The Paper Studio
Alphabet Stickers: Pink Paislee
I-Rock Tool, Rhinestones: Imaginisce
Pearls: Queen & Co
Brads: The Paper Studio
Ribbon: The Ribbon Boutique (Hobby Lobby)
Laminator/Laminating Pockets: Purple Cows
Electronic Cutter, Cartridge: Cricut (Provo Craft), Create A Critter
Software: Cricut Gypsy (Provo Craft)
Electronic Software: Sure Cuts A Lot

Here is a little banner I created to hang in my kitchen during the Thanksgiving holiday. I cut the banner pieces out using my Cricut and SCAL software. I created the SVG file for the pennant myself. If you would like to have it, shoot me an email at aymee810@yahoo.com and I'll be happy to share. After cutting the pennant pieces and adhering them together, I decided to pull out my laminator and laminate them to keep them protected. I laminated them twice to make them really sturdy. After laminating, I strung the banner together using brads. I then added the turkeys and some ribbon.
 I know you can't see it, but I took some more of that orange checkered ribbon and attached it in a loop behind these ribbon accents below. They will act as my hanging mechanism.
 I popped the turkeys up for added dimension. The eyes of the turkeys are little rhinestones that I adhered using my I-Rock tool. You may also can see a bit of a sheen on this from the side view. It's the light outside hitting the laminating parts. It really made the banner shine.
 "Unbeleafably Cute"

Supplies Used
Cardstock: The Paper Studio
Patterned Paper: The Paper Studio (Woodland Friends, Brown & Cream Hounds Tooth, Thanksgiving Words)
Alphabet Stickers: American Crafts
Brads: The Paper Studio
Thread: Coats & Clark
Ink: Tim Holts (Ranger Industries), Spiced Marmalade
Ribbon: Ribbon FX (Hobby Lobby)
Rhinestones: The Paper Studio
Glitter Glue: Stickles (Ranger Industries)
Electronic Cutter: Cricut (Provo Craft)
Cartridges: Create A Critter, Hoot 'N Holler, Plantin' Schoolbook (Provo Craft)

This layout features my nephew Carter a few years ago during a fall photo shoot. I cut the medallion shaped paper in the background on my Cricut and using SCAL software. I made the file for the shape myself. If you'd like that, shoot me an email at aymee810@yahoo.com and I'll share with ya! I then took my sewing machine and stitched around the shape. I then layered some more patterned papers and embellishments.
 These alpha's were originally plain. I inked them with my Tim Holtz Distress Ink to give them a pop of color.
 I wanted to frame my photos in the upper left hand corner so I used up some ribbon scraps.
 I folded up their little wings a tad for some dimension.
 Also, I wanted to share this layout again. I shared it a few days ago, but I had to go back and 'fix' it. LOL. I had the alphabet stickers for the words 'too cute' down a little low and the ribbon trim was hiding them. So I moved them up a tad...much better!
Whoo! My fingers are worn out! LOL! That was one long blog post, but I wanted to share. I hope you didn't mind reading so much. I really appreciate you stopping by my blog! I hope you'll be back again soon!

Have a wonderful, safe 4th of July with your friends and families! Happy Scrappin'!!!
Pin It!

Monday, June 27, 2011

Let Freedom Ring with a 4th of July Gift

Hey guys! Happy Monday! I've got a new post going up on the "She's A Sassylady" blog and wanted to share what I have created. I created this card and cupcake wrapper using my Cricut Expression, Sure Cuts A Lot Software, and SVG files from SVGCuts.com. I thought it would be a nice gesture to make cards and send a cupcake along with it to my friends for the upcoming 4th of July holiday.
 "Happy 4th" Card

Supplies Used
Cardstock: The Paper Studio, Bazzill Basics Paper
Patterned Paper: BasicGrey
Glitter Glue: Stickles (Ranger Industries)
Adhesive: Helmar
Electronic Cutter: Cricut (Provo Craft)
Electronic Cutting Software: Sure Cuts A Lot 2 (Craft Edge)
SVG's: SVG Cuts (Made In The USA)

If you are interested in this set of files, go HERE.
 I have 2 layers of dimension on this card. I popped up the scalloped star and then popped up the silhouettes on top of that.
 "Happy 4th" Cupcake Wrapper

Supplies Used
Cardstock: The Paper Studio
Pearls: Queen & Co.
Electronic Cutter: Cricut (Provo Craft)
Electronic Cutting Software: Sure Cuts A Lot (Craft Edge)
SVG: SVG Cuts (Made In The USA)
Tasty Cupcake: Shur-Fine :)
 Don't these look yummy?! I have to confess...I've already ate 2! But no more...
Thanks for stopping by my blog today! I hope you have enjoyed this project!

Also, I hope that you have a wonderful, safe 4th of July holiday! God Bless!
And Happy Scrappin'!!!
Pin It!

Sunday, June 26, 2011

Too Cute To Spook

Hey y'all! Happy Sunday to you! I hope you are having a wonderful weekend! I wanted to hop online right quick and do a blog post. I finished this page a few days ago. This is another page to go in the Kiel album. This page focuses on little Audrey's first Halloween. This page is very bold with all the bright Halloween colors I found in my scrappy stash.

"Too Cute To Spook"

Supplies Used
Cardstock: The Paper Studio
Patterned Paper: The Paper Studio, Die Cuts With A View, My Mind's Eye
Alphabet Stickers: Momenta, Jillibean Soup, American Crafts, Jenni Bowlin Studio
Chipboard Stickers: American Crafts
Ribbon: Decorative Trim (Hobby Lobby)
Twine: Divine Twine
Electronic Cutter, Cartridge: Cricut (Provo Craft), Plantin' Schoolbook
Software: Sure Cuts A Lot (Craft Edge)

I noticed after I took this photo that I may need to move the words 'too cute' up just a tad. I thought the black trim was more sheer than what is coming through in the photo. So I think I'll go back and move them up a tad. So visualize the words 'too cute' moved up. LOL! Excuse my boo boo!
 I cut these banner pieces using my Cricut and SCAL software. And I simply adore these puffy alpha's from Momenta! I'm definitely going to have to order another set or two. I adhered my twine with Liquid Scrap Dots.
 I used a mixture of alpha's on this page. And check out the ribbon trim I found at Hobby Lobby! Isn't it the cutest trim?!! And it was half off on sale!!
 I pulled this chipboard from my sticker bin. I got it last year on clearance at Big Lots.
Ok, back to the scrappy desk for me. I have work due and need to get busy busy!!! See you tomorrow with some new scrappyness! Enjoy your day!!!

Happy Scrappin'!
Pin It!

Friday, June 24, 2011

Operation Write Home Challenge: Day 6 & 7

Hey y'all! Happy Friday! I hope you are enjoying a wonderful weekend so far! I've been at my scrappy desk today. I managed to finish 2 more cards for the 'Operation Write Home' Challenge and a layout. I'll take pix of the layout tomorrow and post it. But today, I thought I'd hop online and do a blog post with the 2 cards I finished. First up...

"I'm Wild About You"

Supplies Used
Card Base: The Paper Studio
Cardstock: Bazzill Basics Paper, The Paper Studio
Patterned Paper: Jillibean Soup
Die Cut: K & Company
Rhinestones: Studio 18
Trim: Ribbon FX (Hobby Lobby)
Twine: Divine Twine
Corner Punch: EK Success
Border Punch: Martha Stewart Crafts
Adhesive: Helmar Quick Fix Adhesive Runner, Helmar 450 Quick Dry Adhesive, Helmar Liquid Scrap Dots

This card is for Day 6 of the Operation Write Home Challenge. The specs of the challenge are to create a masculine card and to use twine. Well, I don't know how masculine you would call this card. Masculine projects are not my forte'. LOL. But the little monkey on this die cut looked like a boy to me and was the inspiration behind my patterned papers and embellishments. The colors red and brown together also look masculine to me. So although this card may be a tad cutesy, I did my best and am happy with it.
 
"In Sympathy"

Supplies Used
Card Base: The Paper Studio
Cardstock: The Paper Studio
Patterned Paper: Crate Paper
Rub On: Kaisercraft
Ribbon: Ribbon FX (Hobby Lobby)
Thread: Coats & Clark
Border/Edge Punch Combo: Martha Stewart Crafts
Electronic Cutter, Cartridge: Cricut (Provo Craft), Home Decor'
Embossing Machine, Embossing Folder: Cuttlebug (Provo Craft), Swiss Dots
Adhesive: Helmar Quick Fix Adhesive Runner, Helmar 450 Quick Dry, Helmar Zap Dots
Other: sewing machine

This card is for day 7 of the challenge. The specs of the challenge are to create a sympathy card. I used a palette of blues, creams, and blacks. I tried to keep this card formal looking.

See you tomorrow! Have a great evening!

Happy Scrappin' to ya!
Pin It!

Wednesday, June 22, 2011

Operation Write Home Challenge: Day 4 & 5

Happy Wednesday everyone! I hope you are having a wonderful day! I have been working at my scrappy desk today having a grand old time! I was able to finish 1 layout and 2 cards. I will have to share the layout at a later date as it is for Momenta...my very first Momenta project actually. I am so excited about it! Those Momenta products are just beyond adorable and so fun to work with!!!

Anyways, I created my cards for day 4 & 5 of the 'Operation Write Home' challenge that I am participating in. As you may already know, these cards will be sent overseas to our soldiers so that they may write to their loved ones. I am keeping all of these cards fairly simple and not dimensional. I wanted them to fit into the envelopes and be easy to mail. So here we go with the next two...

"Hello"
Supplies Used
Cardstock: Bazzill Basics Paper, The Paper Studio
Patterned Paper: K & Company
Chipboard Alphabet Stickers: BasicGrey
Rhinestones: Queen & Co
Trims: source unknown (purchased at a local discount store)
Electronic Cutter, Cartridge: Cricut (Provo Craft), Home Decor'

This card is for day 5 of the challenge. The challenge was to use purple flowers on a card. I have purple flowers in my patterned paper.
 Love these trims. I got them each 99 cents a yard at a local discount store we have in our town called 'Surplus City.' I love that place! There is an aisle full of trims, ribbons, lace, etc. Love it!!! And it's so affordable!
 "Hi"
Supplies Used
Pre-Printed Card Base: The Paper Studio
Cardstock: The Paper Studio
Patterned Paper: Cosmo Cricket
Alphabet Stickers: Cloud 9 Design
Corner Sticker: Daisy D's
Flowers: Prima Marketing
Button: Jenni Bowlin Studio

This one is for day 4 of the challenge which required you to use red buttons on a card. I only had 1 red button in my scrappy stash, so I used it.
 Popped my flowers up just a tad with Liquid Scrap Dots.
That's all for today. Brandon and I are off to Hobby Lobby tomorrow, so I don't know if I'll get to scrap or not. But I will for sure on Friday. See you later!

Thanks for visiting my blog! Happy Scrappin'!!!
Pin It!

Tuesday, June 21, 2011

Welcome Home

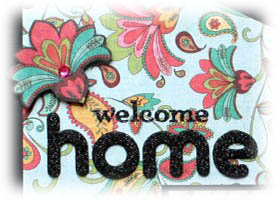
Hey y'all! I hope you are having a fabulous day! I wanted to hop online right quick and blog. I created this layout yesterday afternoon. This page is the next in the album I'm working on for Mrs. Kiel and her baby girl, Audrey. This page focuses on Audrey's first week at home. This is the first layout in a really long time that I did on a black cardstock background. But I loved the way the bold black popped with this patterned paper I purchased at Hobby Lobby.

"Welcome Home"
Supplies Used
Cardstock: The Paper Studio
Patterned Paper: My Mind's Eye, The Paper Studio
Alphabet Stickers: American Crafts, Making Memories
Journaling Die Cut: Elle's Studio
Rhinestones: Queen & Co
Border Punch: EK Success
Cutting Tool: Purple Cows Freestyle Mouse
Adhesive: Helmar Quick Fix Adhesive Runner, Helmar Zap Dots
I cut this flower out of some coordinating patterned paper. I popped it up with Zap Dots and added a rhinestone to the flower.
This die cut, from Elle's Studio, is a place where the new Mom may journal her thoughts.
I cut the flower above the title out of the same coordinating paper as the one above. The alpha's are a mixture of Making Memories and American Crafts. 
 To show a bit of the dimension.
That's all for me today. Thanks so much for stopping by! I hope you all have a wonderful evening!
Happy Scrappin'!!!
Pin It!